Van Build Series: Week 7 - Pine Cladding the Walls
I think we’re now at a turning point in the van. This week we finally made a start on the cladding and built our headliner shelf. The cladding was a joy, the headliner shelf… not so much! It was complicated and annoying, but we got there in the end. We clad the left side of the van, as this was the easier side to begin with. It meant we could get a grip on how to put up the cladding before we tackle more complicated areas (i.e around the window). We’re so happy with how it looks – she’s finally looking like a camper!
Pine Cladding the Walls
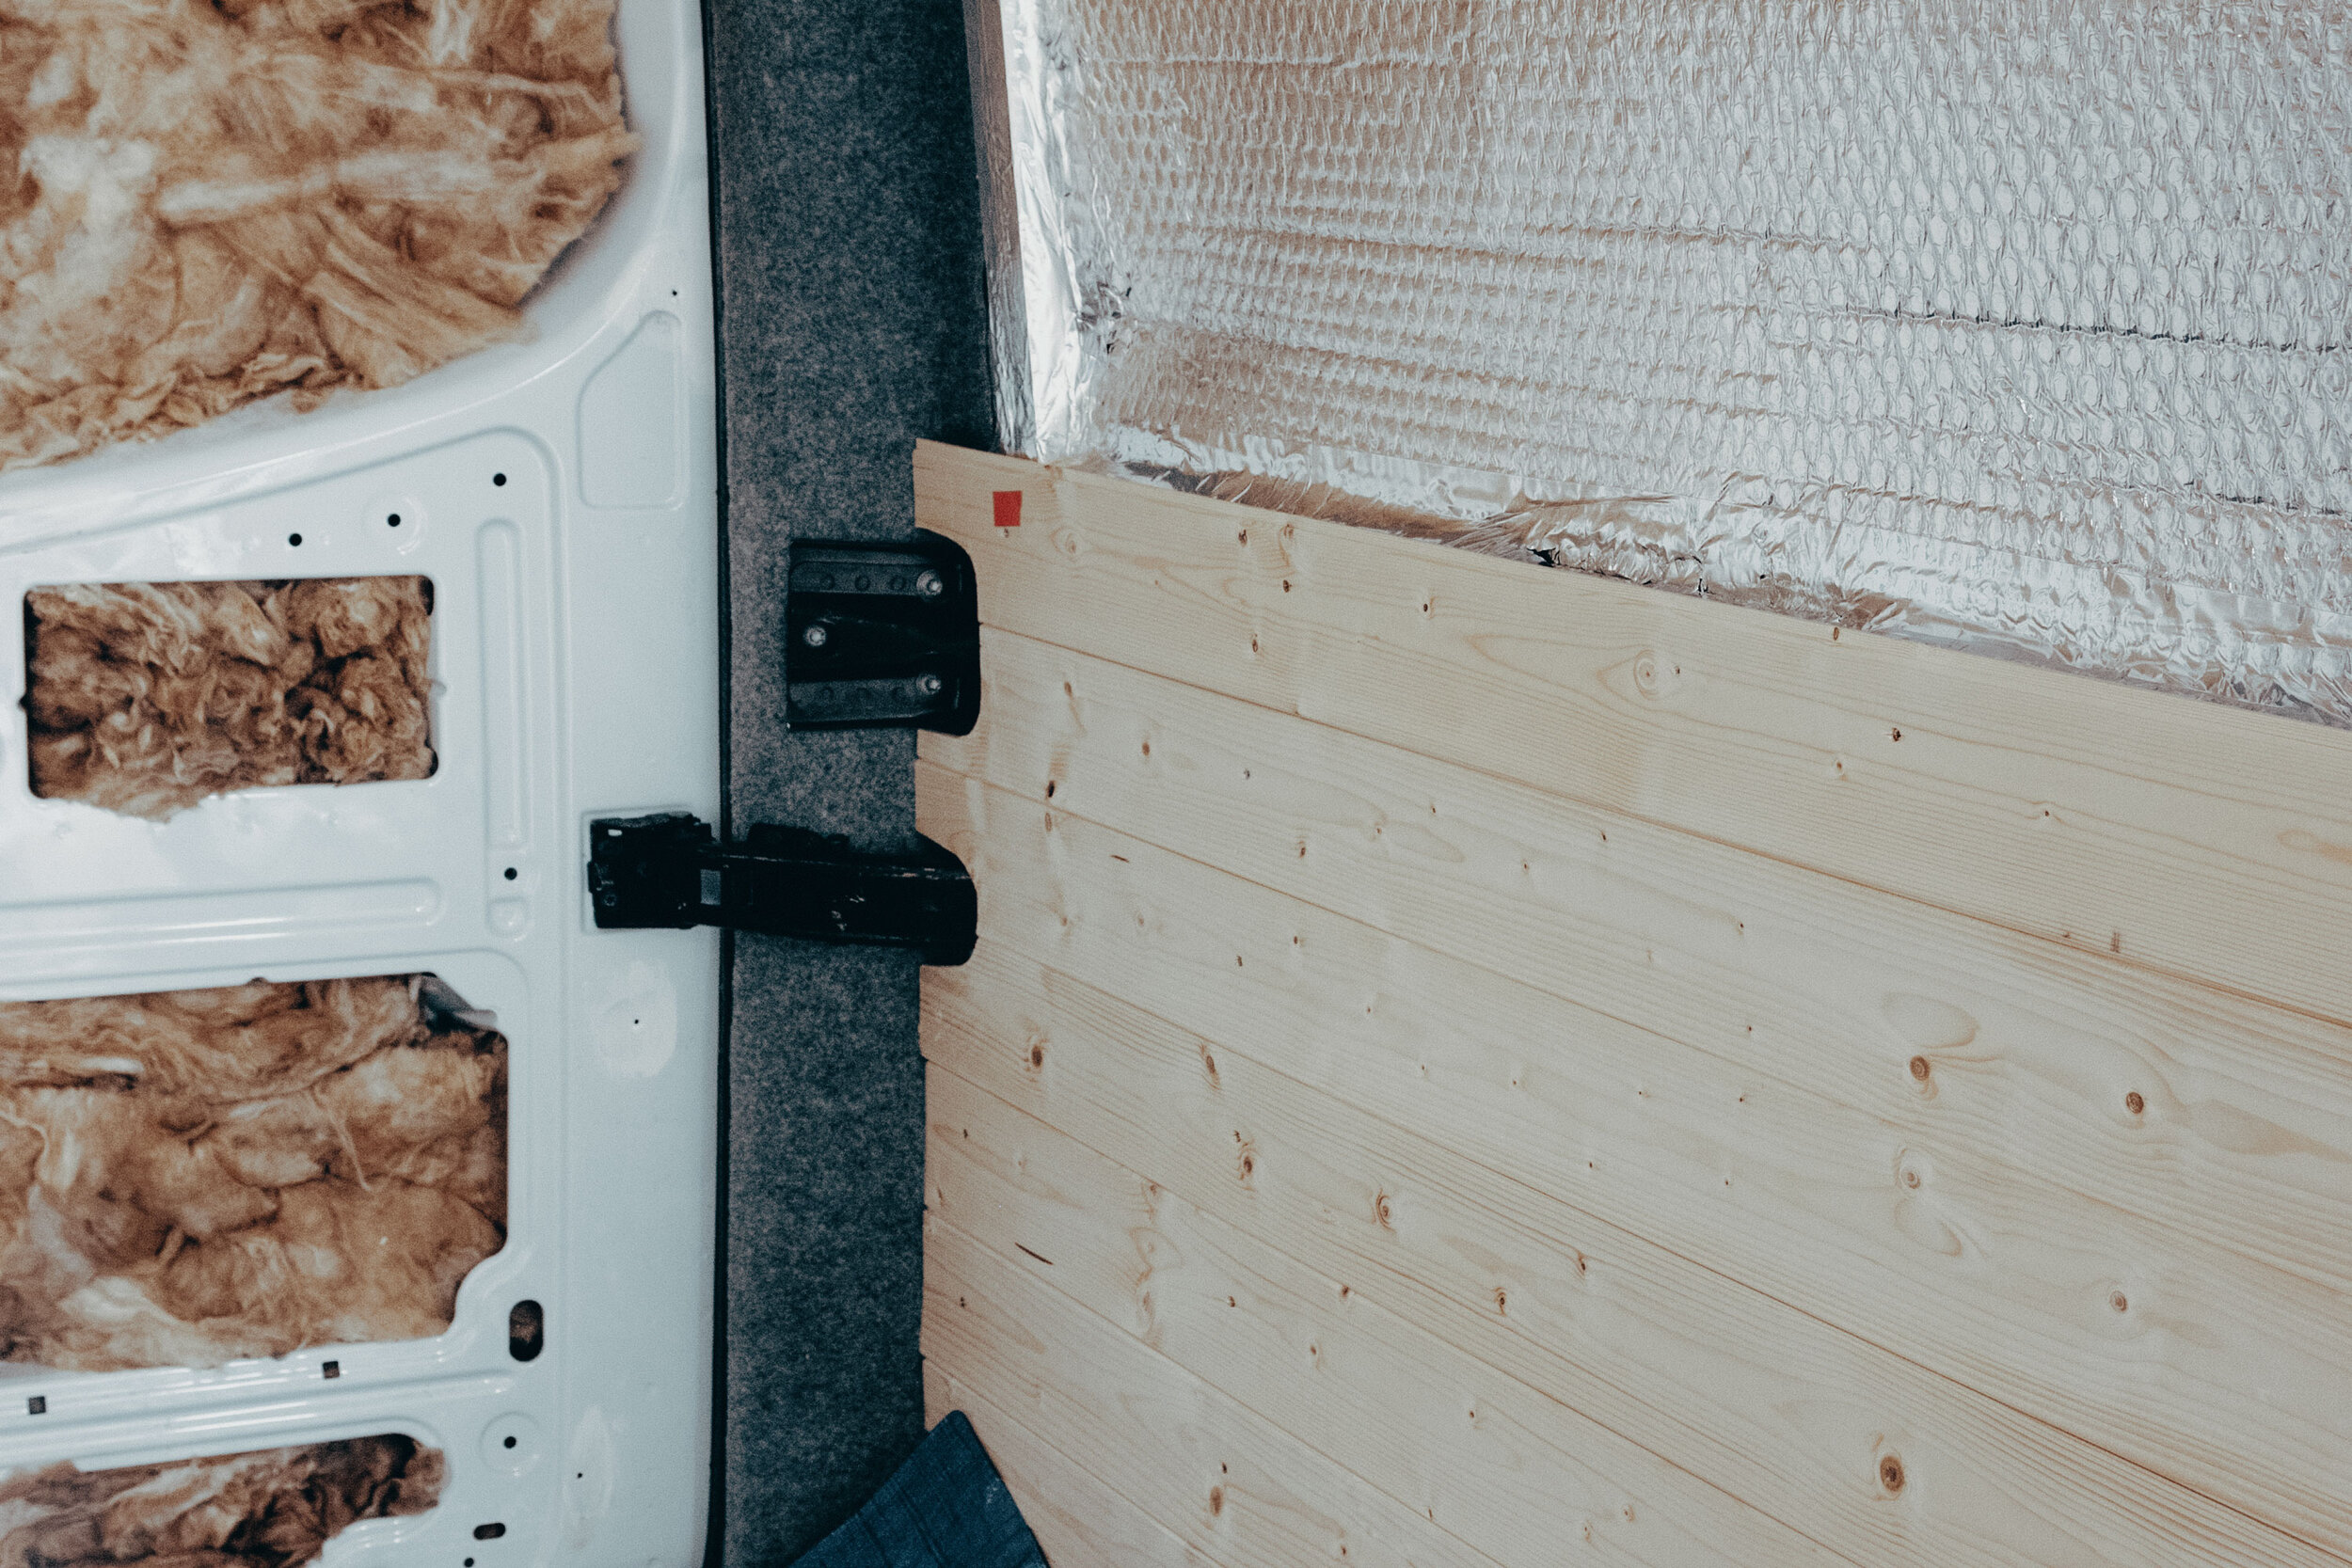
To clad the walls, we used an 8mm softwood cladding from Wickes, which came in 3m lengths. We’d read that this cladding can be quite brittle, with people finding broken pieces when they opened the pack. Luckily, we’ve found no broken pieces in any of our packs (which is about 10 so far). We’ve had a couple of ends split when we’ve screwed too close to the edge, but other than that we’ve found it a great wood to clad with.
It’s a tongue & groove cladding which we’ve secured with wood screws. We were going to use cladding clips, but there were a couple of reasons we decided not to.
The wood has lots of character, with loads of little knots dotted all over it. You can barely see the screws as they blend in with the knots.
Having the screws showing allows us to see easily where battens are for when we fit the furniture.
I’m going to be painting the wood white, so the screws should be barely noticeable at all.
Before we started the cladding, we wanted to use the original plywood walls as templates, especially for the areas around the door hinges and the wheel arches. However, these were at Ben’s mum’s house, which is an hours drive away. So we decided to freestyle it, with Ben creating templates using paper. It worked perfectly! He did an amazing job of cutting the cladding down and we were really happy with how neat and tidy it all turned out. In hindsight, it was easier this way. We didn’t have to mess around with large bits of plywood and try and line it up with the cladding.
It was then a case of measuring the cladding, cutting it to size and then screwing it into our ready placed battens. Once we’d passed the wheel arch and the hinges, it was plain sailing. The lengths were almost perfect and we had the rest up pretty quickly. We used a 15mm white trim on the edge near the back door, which really tidied up the edge and gave it a lovely finish. We used an inexpensive (£3) white trim from Wickes, to match the walls when we paint them white.

Cladding around the wheel arches. These will be covered by boxes eventually

Example of the templates Ben created around the door hinges

They worked perfectly and we’re really happy with how they look!

Cutting the plywood cladding
It went much faster once we got past these fiddly bits

Details of the cladding near the sliding door

To prevent the wood splitting, it took a delicate hand screwing the cladding in place

Getting there! Red tape to mark vertical battens (I’ve since removed this though) -if we were using cladding clips, the red tape would be very useful
Building the Headliner Shelf
I could really write an entire blog post about headlinergate! Before we could put cladding on the right side of the van, we needed to start building out our bulkhead so that we could place the battens there before the cladding. This also meant building the headliner shelf, as we 100% want to utilise this empty space for storage. However, the headliner area is not designed to have a level shelf in it! It has weird curves at the back, it has wide bits and it has narrow bits. I would love to explain in detail how we did it, but it was lots of trial and error.
So Many Templates!
We began by measuring the length of the area and the widest part. We then used a contour gauge (SUCH a handy tool for use in a van!) to template the outer edges that have a narrow part to them. Apologies for the lack of technical terms, but if you have a sprinter, you probably know which bits I’m referring to! This seemed to work for half of the shelf, but the part of the shelf near the front of the van was a challenge. For this, we made a terrible scribe out of a pen and a washer, and tried to scribe the contour of this very curvy edge onto a piece of cardboard. We didn’t have a piece of cardboard long enough, so we taped three parts together and tried to keep these level while marking out the shape. It was awful! But, somehow we managed to get a template for this part cut from plywood, which left us with two templates – one for the back of the shelf, and one for the front. We laid these on top of each other and cut out the shelf. It worked! We couldn’t quite believe it. We finished off by securing battens to the underside of the shelf to give it some rigidity.
Finishing the Shelf
We had plenty of carpet leftover from when we carpeted around the doors, so we used this to finish off the shelf. With the help of a couple of Youtube videos, this part was fairly enjoyable and straightforward. Once it was carpeted, we secured it in place by using brackets screwed into the handles above the doors. We also put a batten across the entire width of the van, which was also our starting point for the bulkhead. We added a couple of screws from the shelf into here, and we were good to go. We never want to go near a headliner shelf again!

The finished headliner shelf

Carpeting was the most enjoyable part of building the shelf!
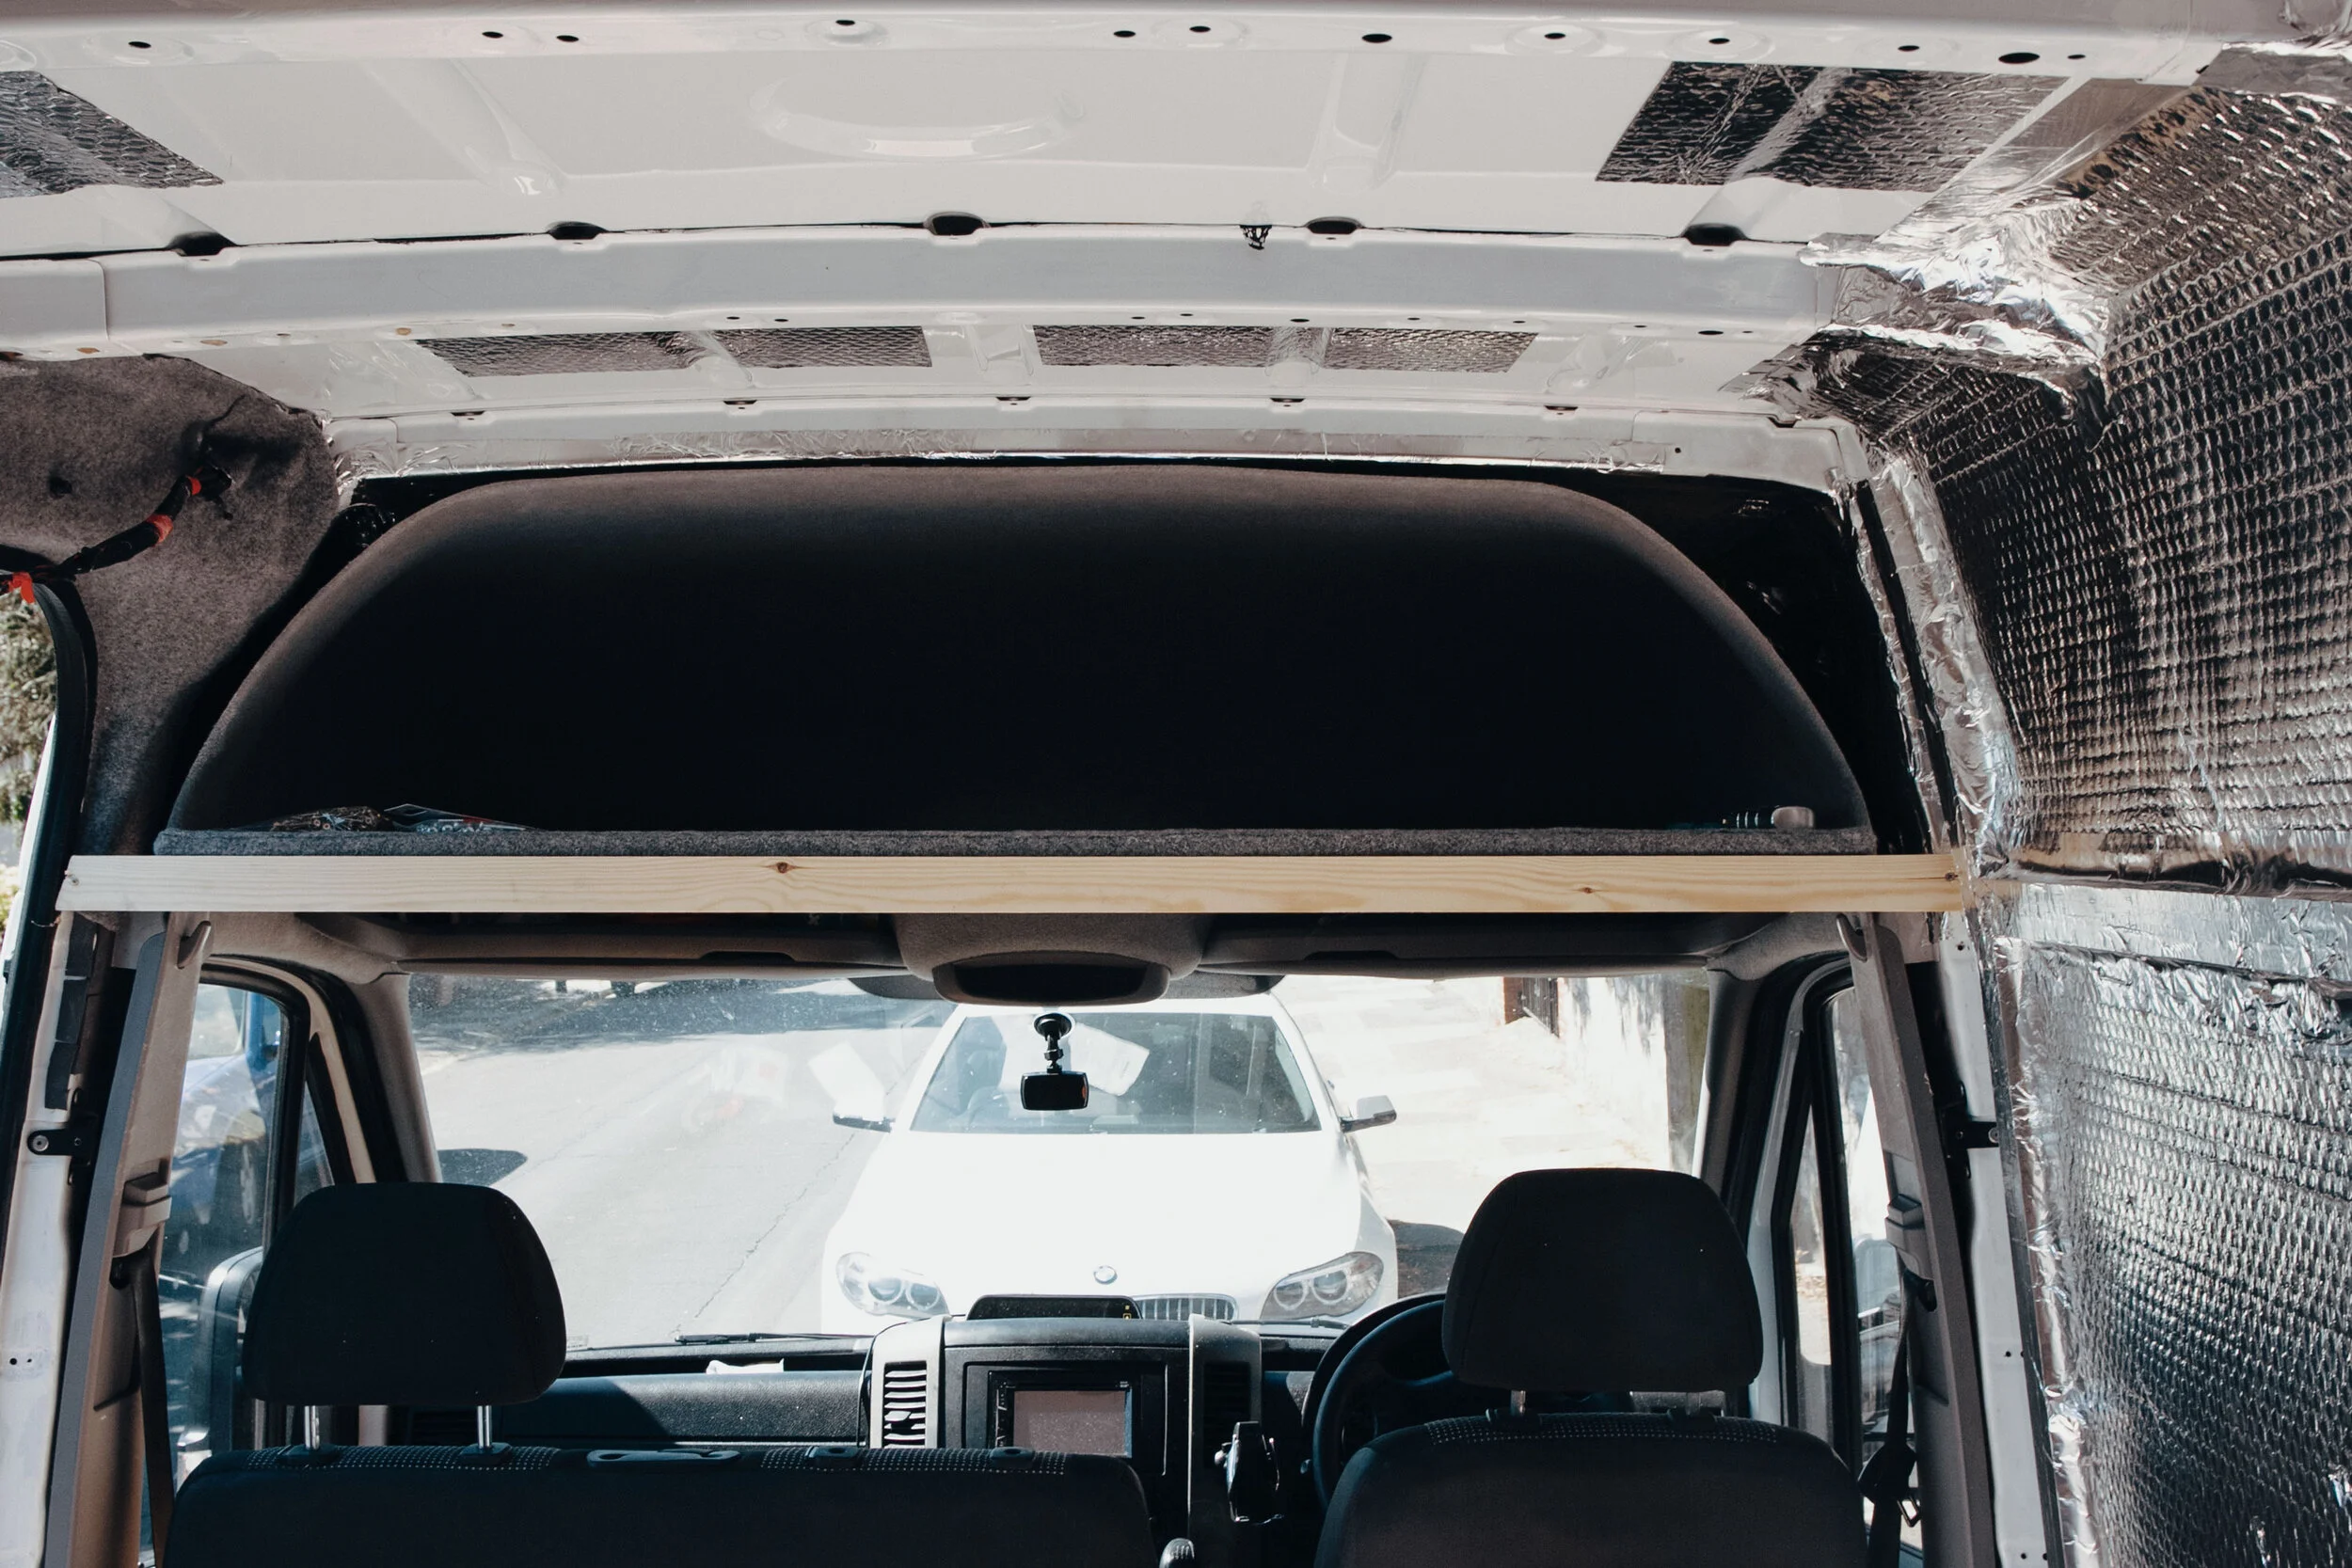
The headliner shelf in situ

View from the cab underneath the shelf

Once the shelf was in, we started battening out the bulkhead

Pocket-holing the battens in place

We will probably add a couple of battens at the bottom but this is the finished studwork framing for the kitchen
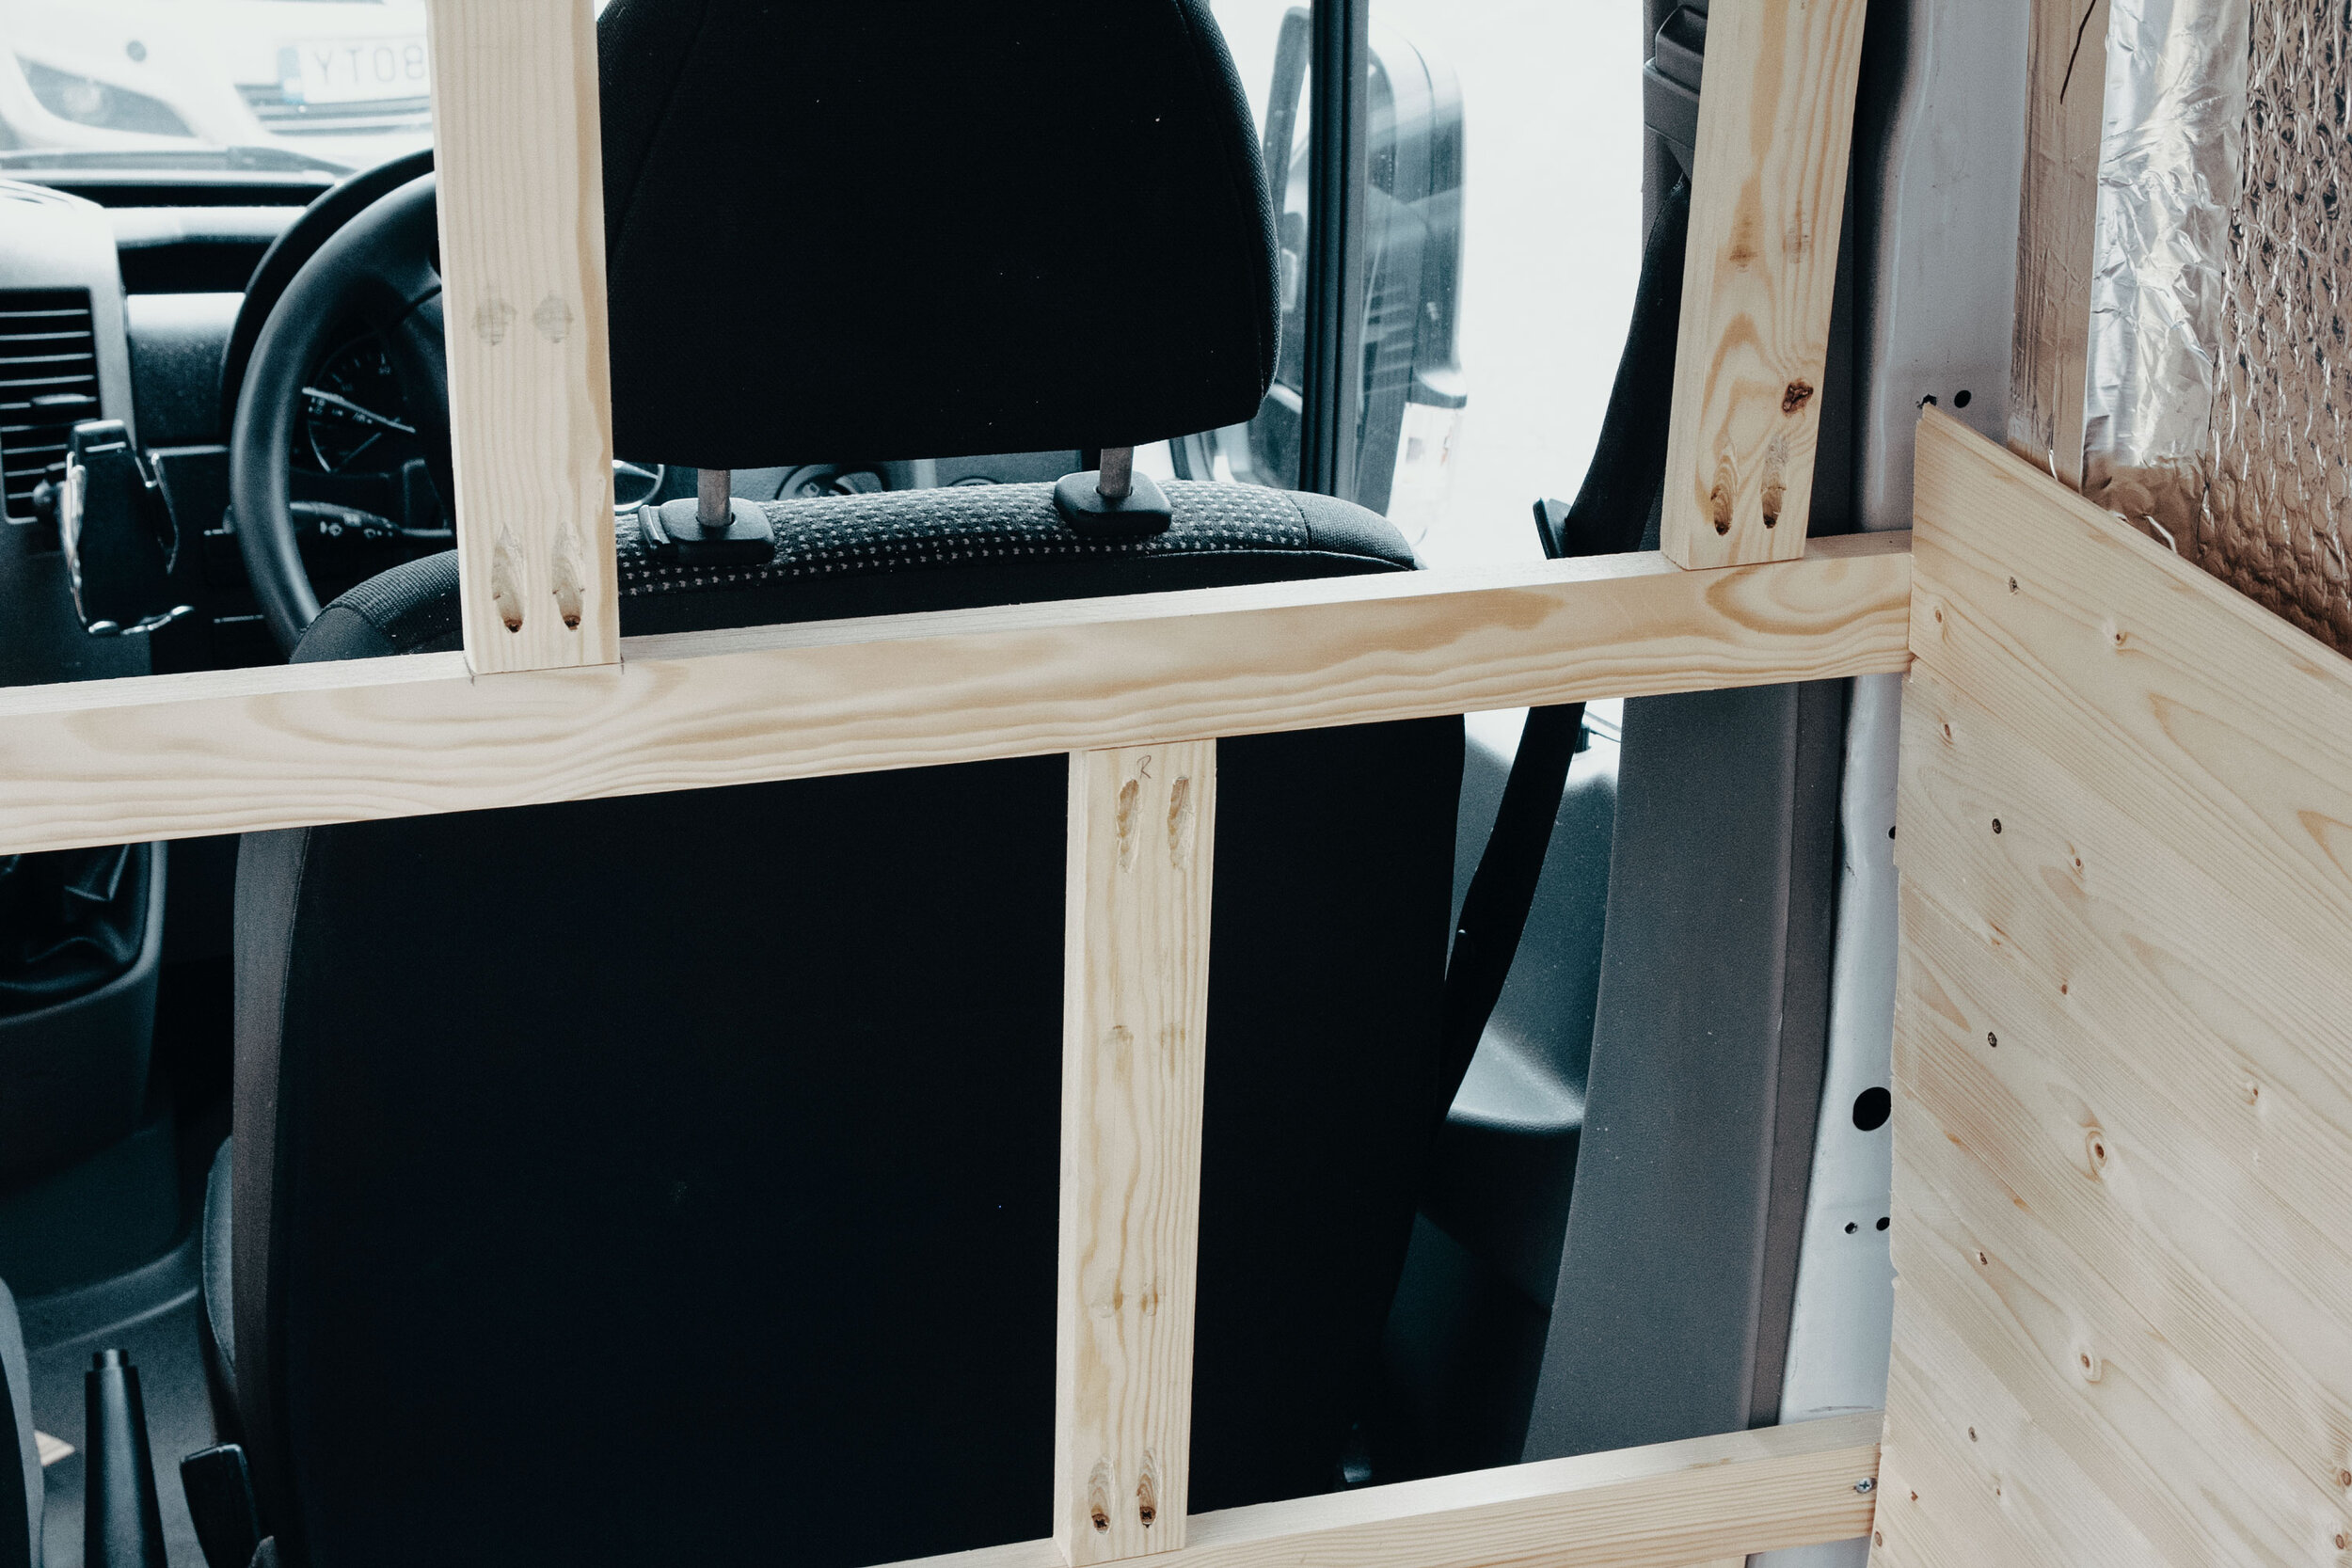
Close up of the framing
We then built out the bulkhead, which is where our kitchen will be. This didn’t take much time at all, and Ben made another great job of the stud work here. Because we now have the battens in place for our bulkhead, it means we can clad the other wall! Looking back on our earlier posts, it’s amazing how far we’ve come, but the end also feels so far away, too. All part of the wonderful van life journey.
Products We Used:
Pine Wood Cladding - https://bit.ly/2LeNHhs (not an affiliate link)