Van Build Series: Week 10 - Installing Fiamma Roof Vent

To say we were apprehensive about this part of the build is an understatement. Anyone who’s had to cut a hole in the roof of their van will know that feeling of trepidation and anticipation. We were keen to get the fan installed so that we could progress with the rest of the build, but we also knew if we made a mistake there would be no going back! Still, there comes a time when you just have to grit your teeth and do it, so this week, that’s exactly what we did.
Before we get started, we installed a Fiamma Turbo Vent 28 in Crystal. The crystal version has a clear covering, which lets natural light into the van. The 28 is the smaller version of the fan, and is exactly the size we wanted for our kitchen area. There are a few good fans out there for campervans and caravans, and Fiamma is one of the popular choices out there.
Prepping the Roof
Before we cut into our van roof, we had our roof rack to consider. We’d fitted our roof rack knowing it might hinder the opening of our ceiling fan. This would mean cutting a bar off the roof rack, and we didn’t really want to do that. The fan would sit between two bars of the roof rack, and we tried our best to mark out the area we thought was large enough to allow the fan hinges to open fully. Due to plug sockets and where we were building the van, we weren’t able to get a jigsaw on top of the van to cut the hole. Ben’s Dad had a hand angle grinder, and while this wasn’t our first option, we decided with enough protection in the van it could work. We marked out the area to be cut with masking tape inside in the van. Next we built a tent out of plastic to stop any sparks and swarf from flying off into the van. The floor was covered with tarp for the same reasons.
Cutting the Hole
After measuring the hole was the right size for the 50th time, it was time to make the first cut. Ben and his Dad cut the hole slowly and methodically. Before we knew it there was a gaping hole in the roof of our van! The angle grinder had left a clean cut which didn’t need much tidying up. We offered up the fan – and it fit! Huge sighs of relief all round!
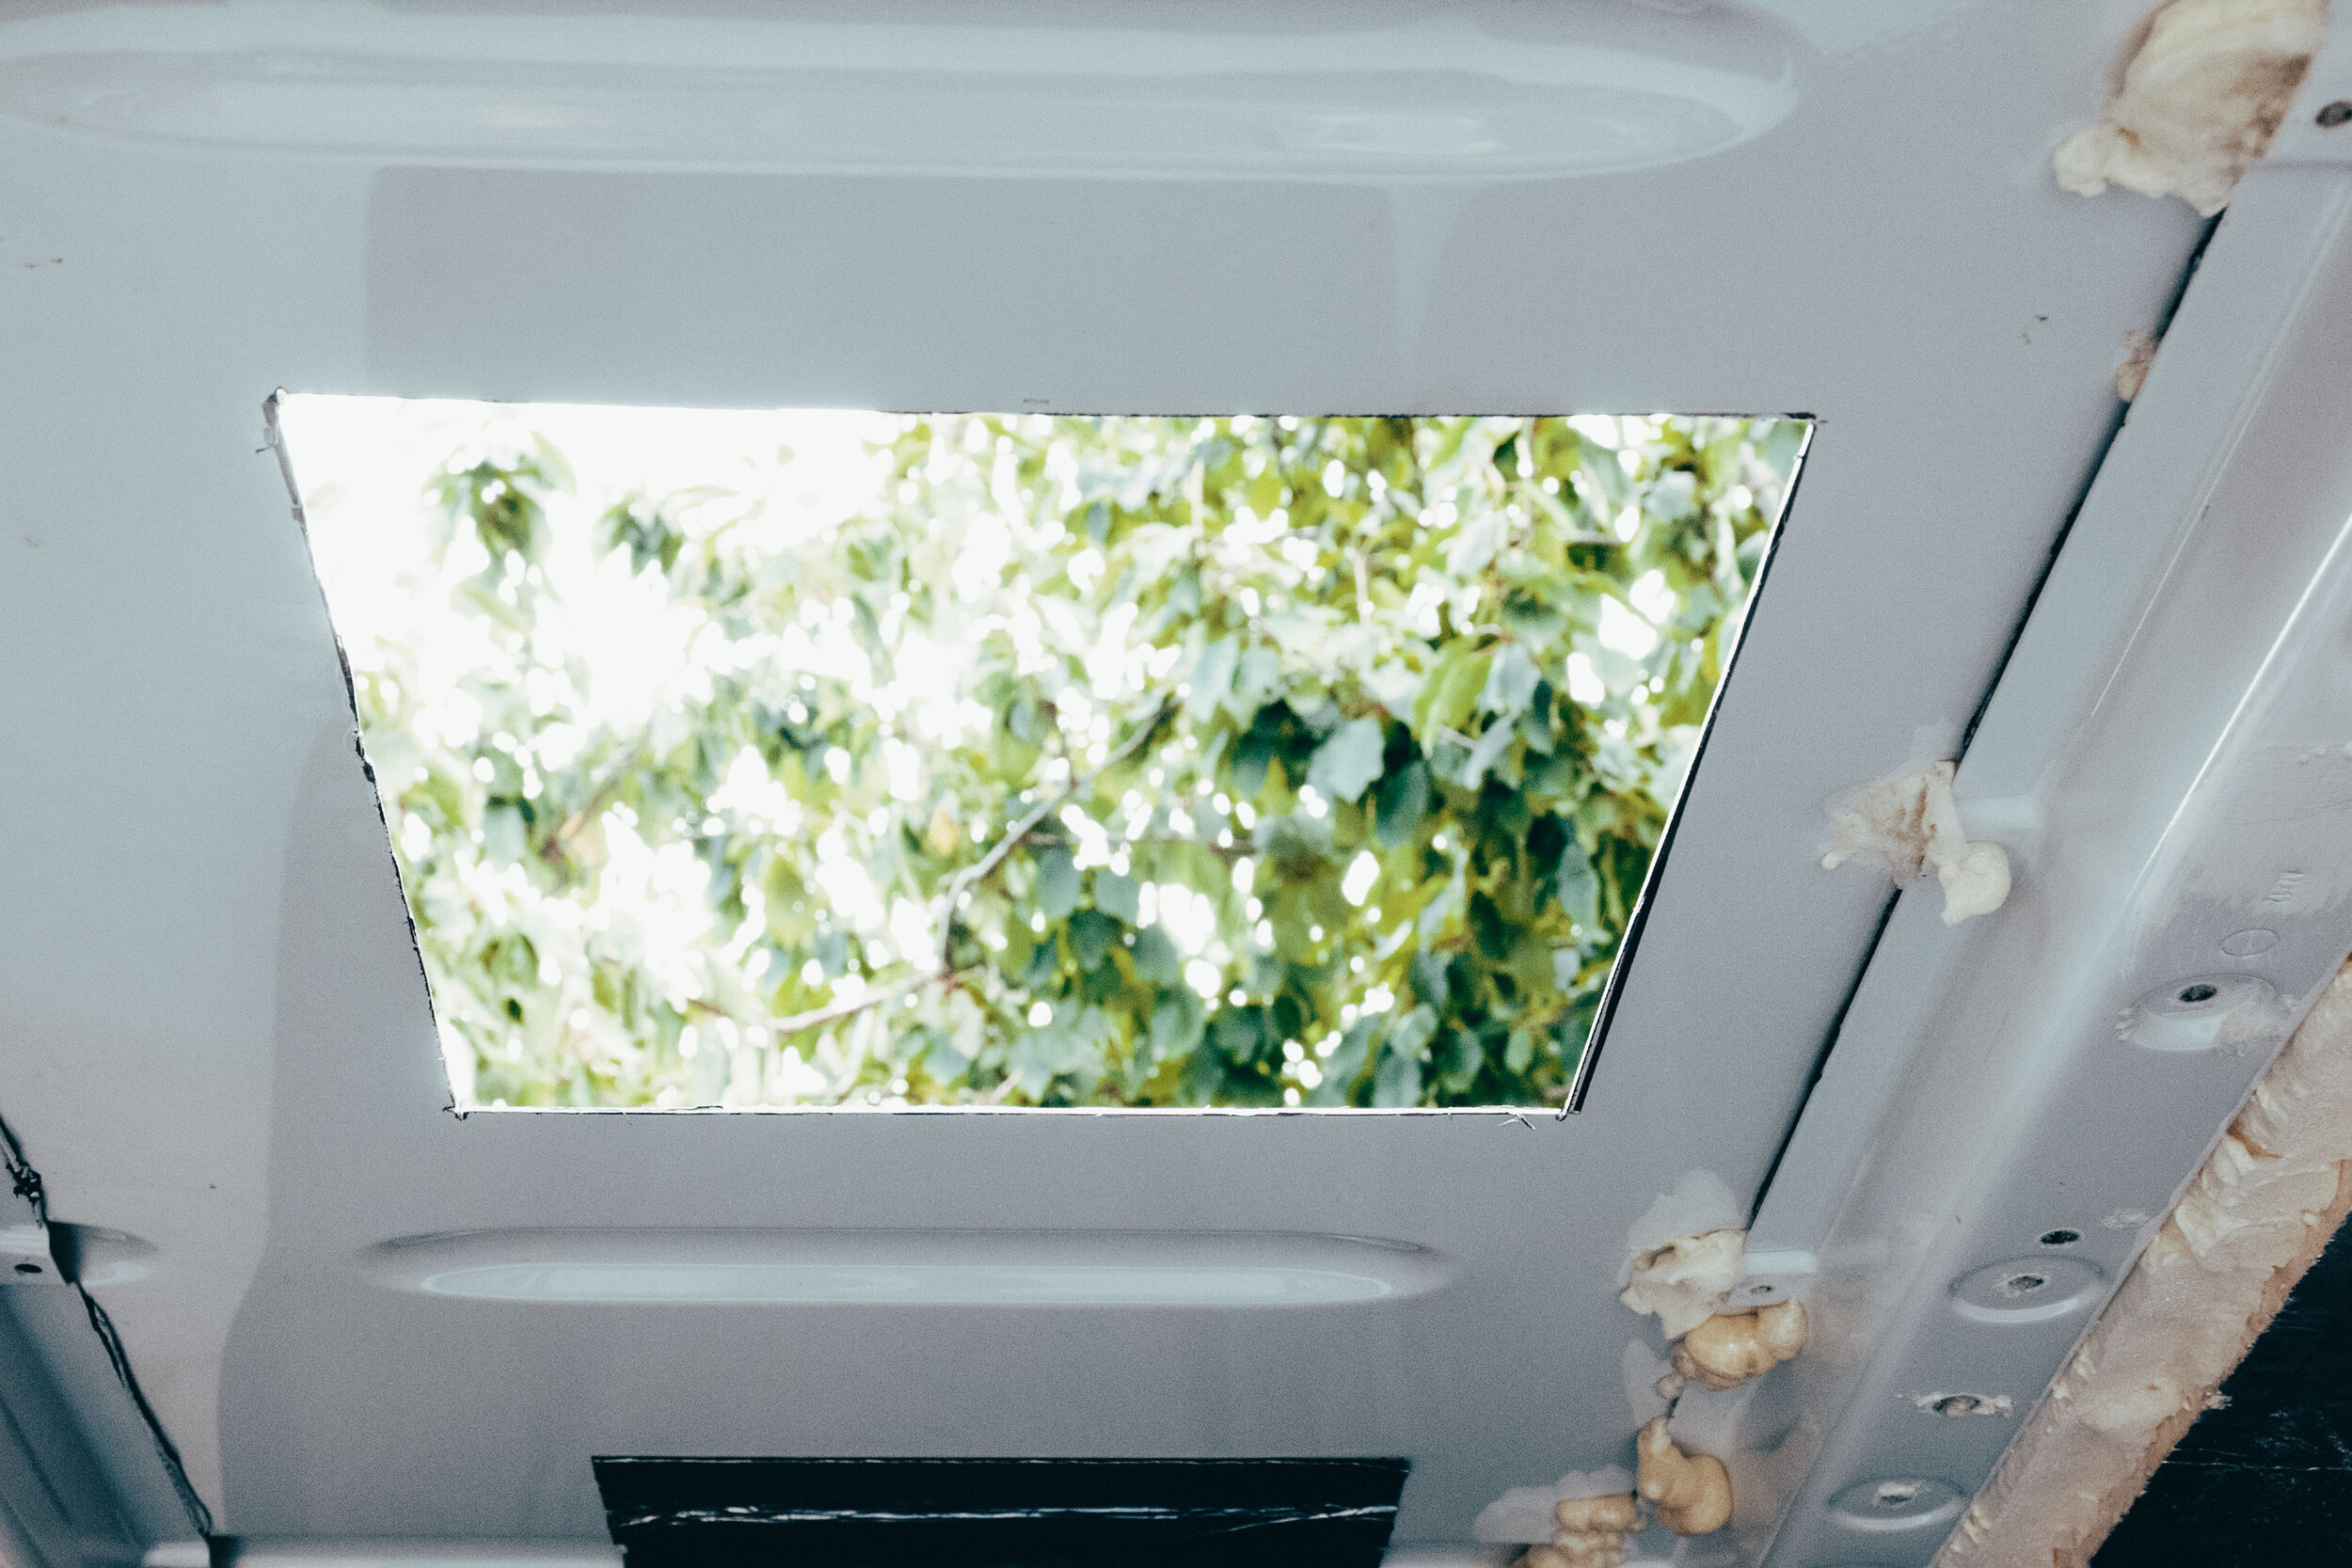
The finished hole for the fan!
Fitting the Fan
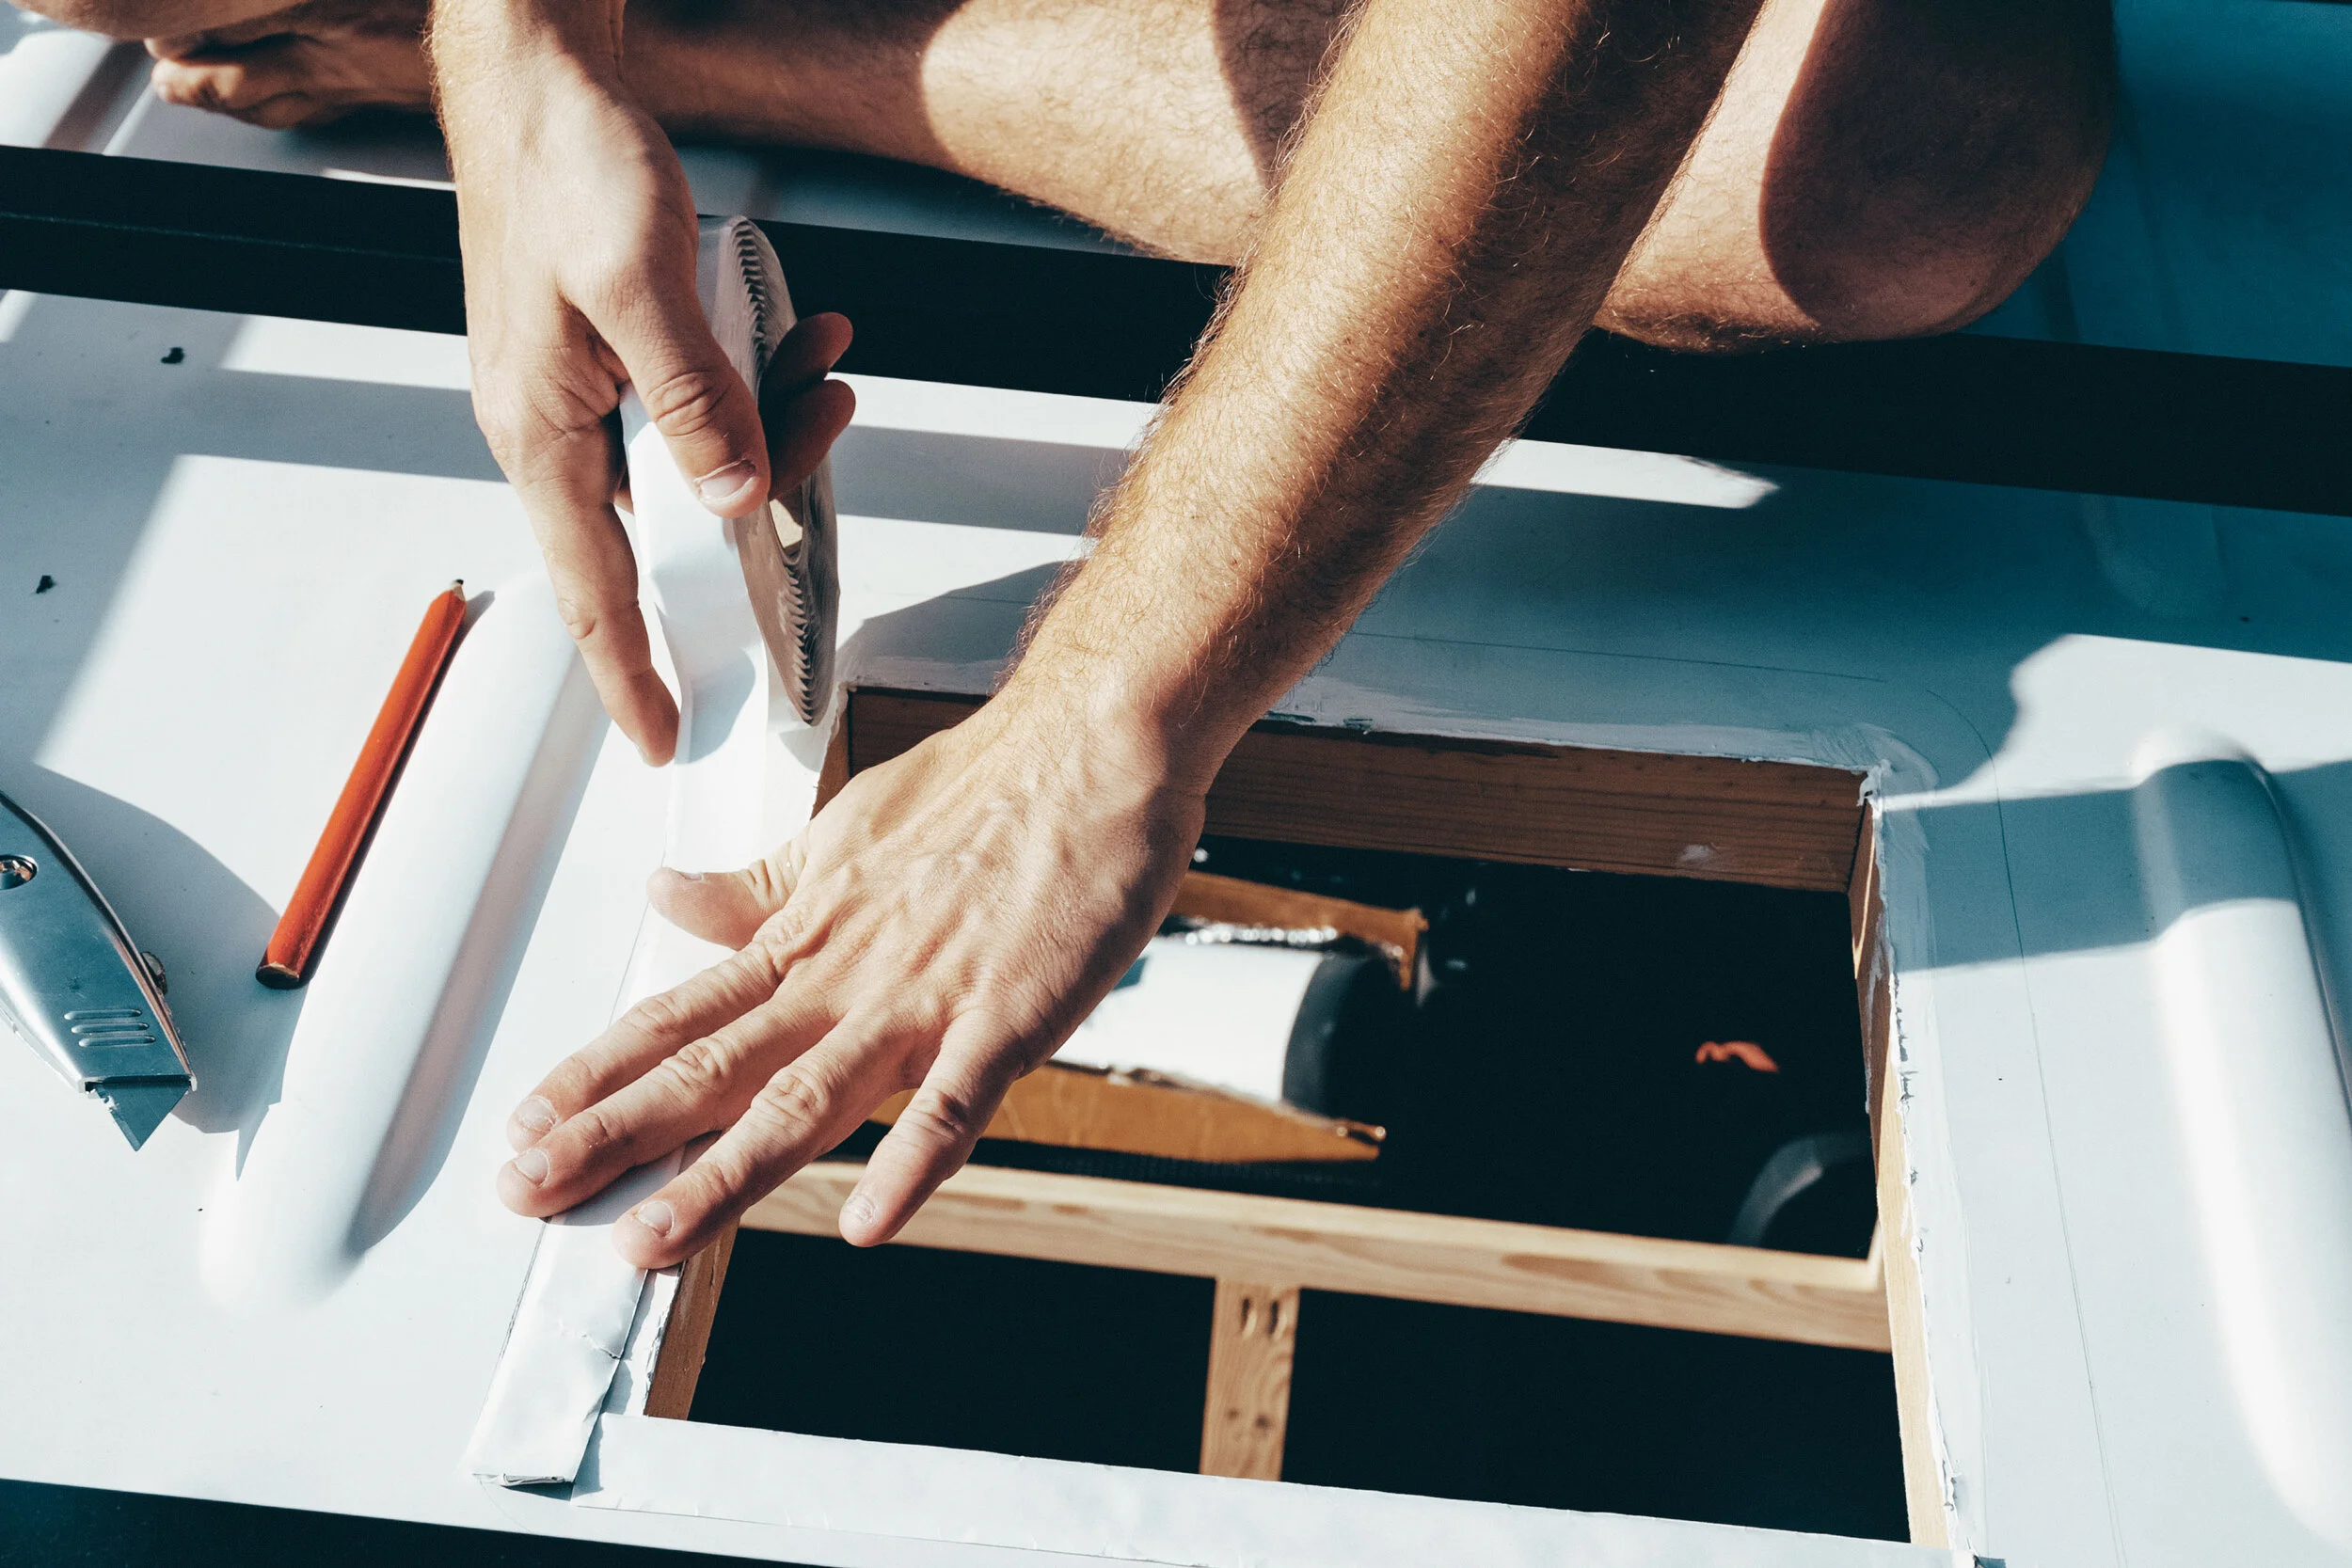
First, we used a metal file to clean the edges of the hole. Next, we used some alcohol rub to clean the area, before applying a coat of Hammerite white paint to cover the exposed metal. We left this to dry for half an hour or so, before attaching the wooden frame we had built to support the fan. We secured this with a glue adhesive and lots of clamps to keep it in place! We placed a plastic bag over the hole and left it to dry overnight. The next morning, we put the fan into the roof! It still fit snug, and it fit perfectly into the frame. We were also very happy to see that we had placed the fan just right – the roof rack didn’t hinder the opening of the fan at all! We used mastic tape to seal the edges, as well as a very generous helping of Sikaflex 512 adhesive to keep the fan water tight. The Fiamma 28 fan only needs screwing into itself – there are no screws going into the van itself – which we were happy about. The next job is to wire her up!

Using hammerite to rust treat the exposed metal that’s been cut

Painting on some Hammerite, and admiring the temporary window

Securing the wooden frame with lots of clamps

The frame in place, and the fan fits!

Ready to get this fan watertight!
Sealing the edges with mastic tape first

Using Sikaflex 512 Caravan adhesive to secure the fan down and keep it sealed
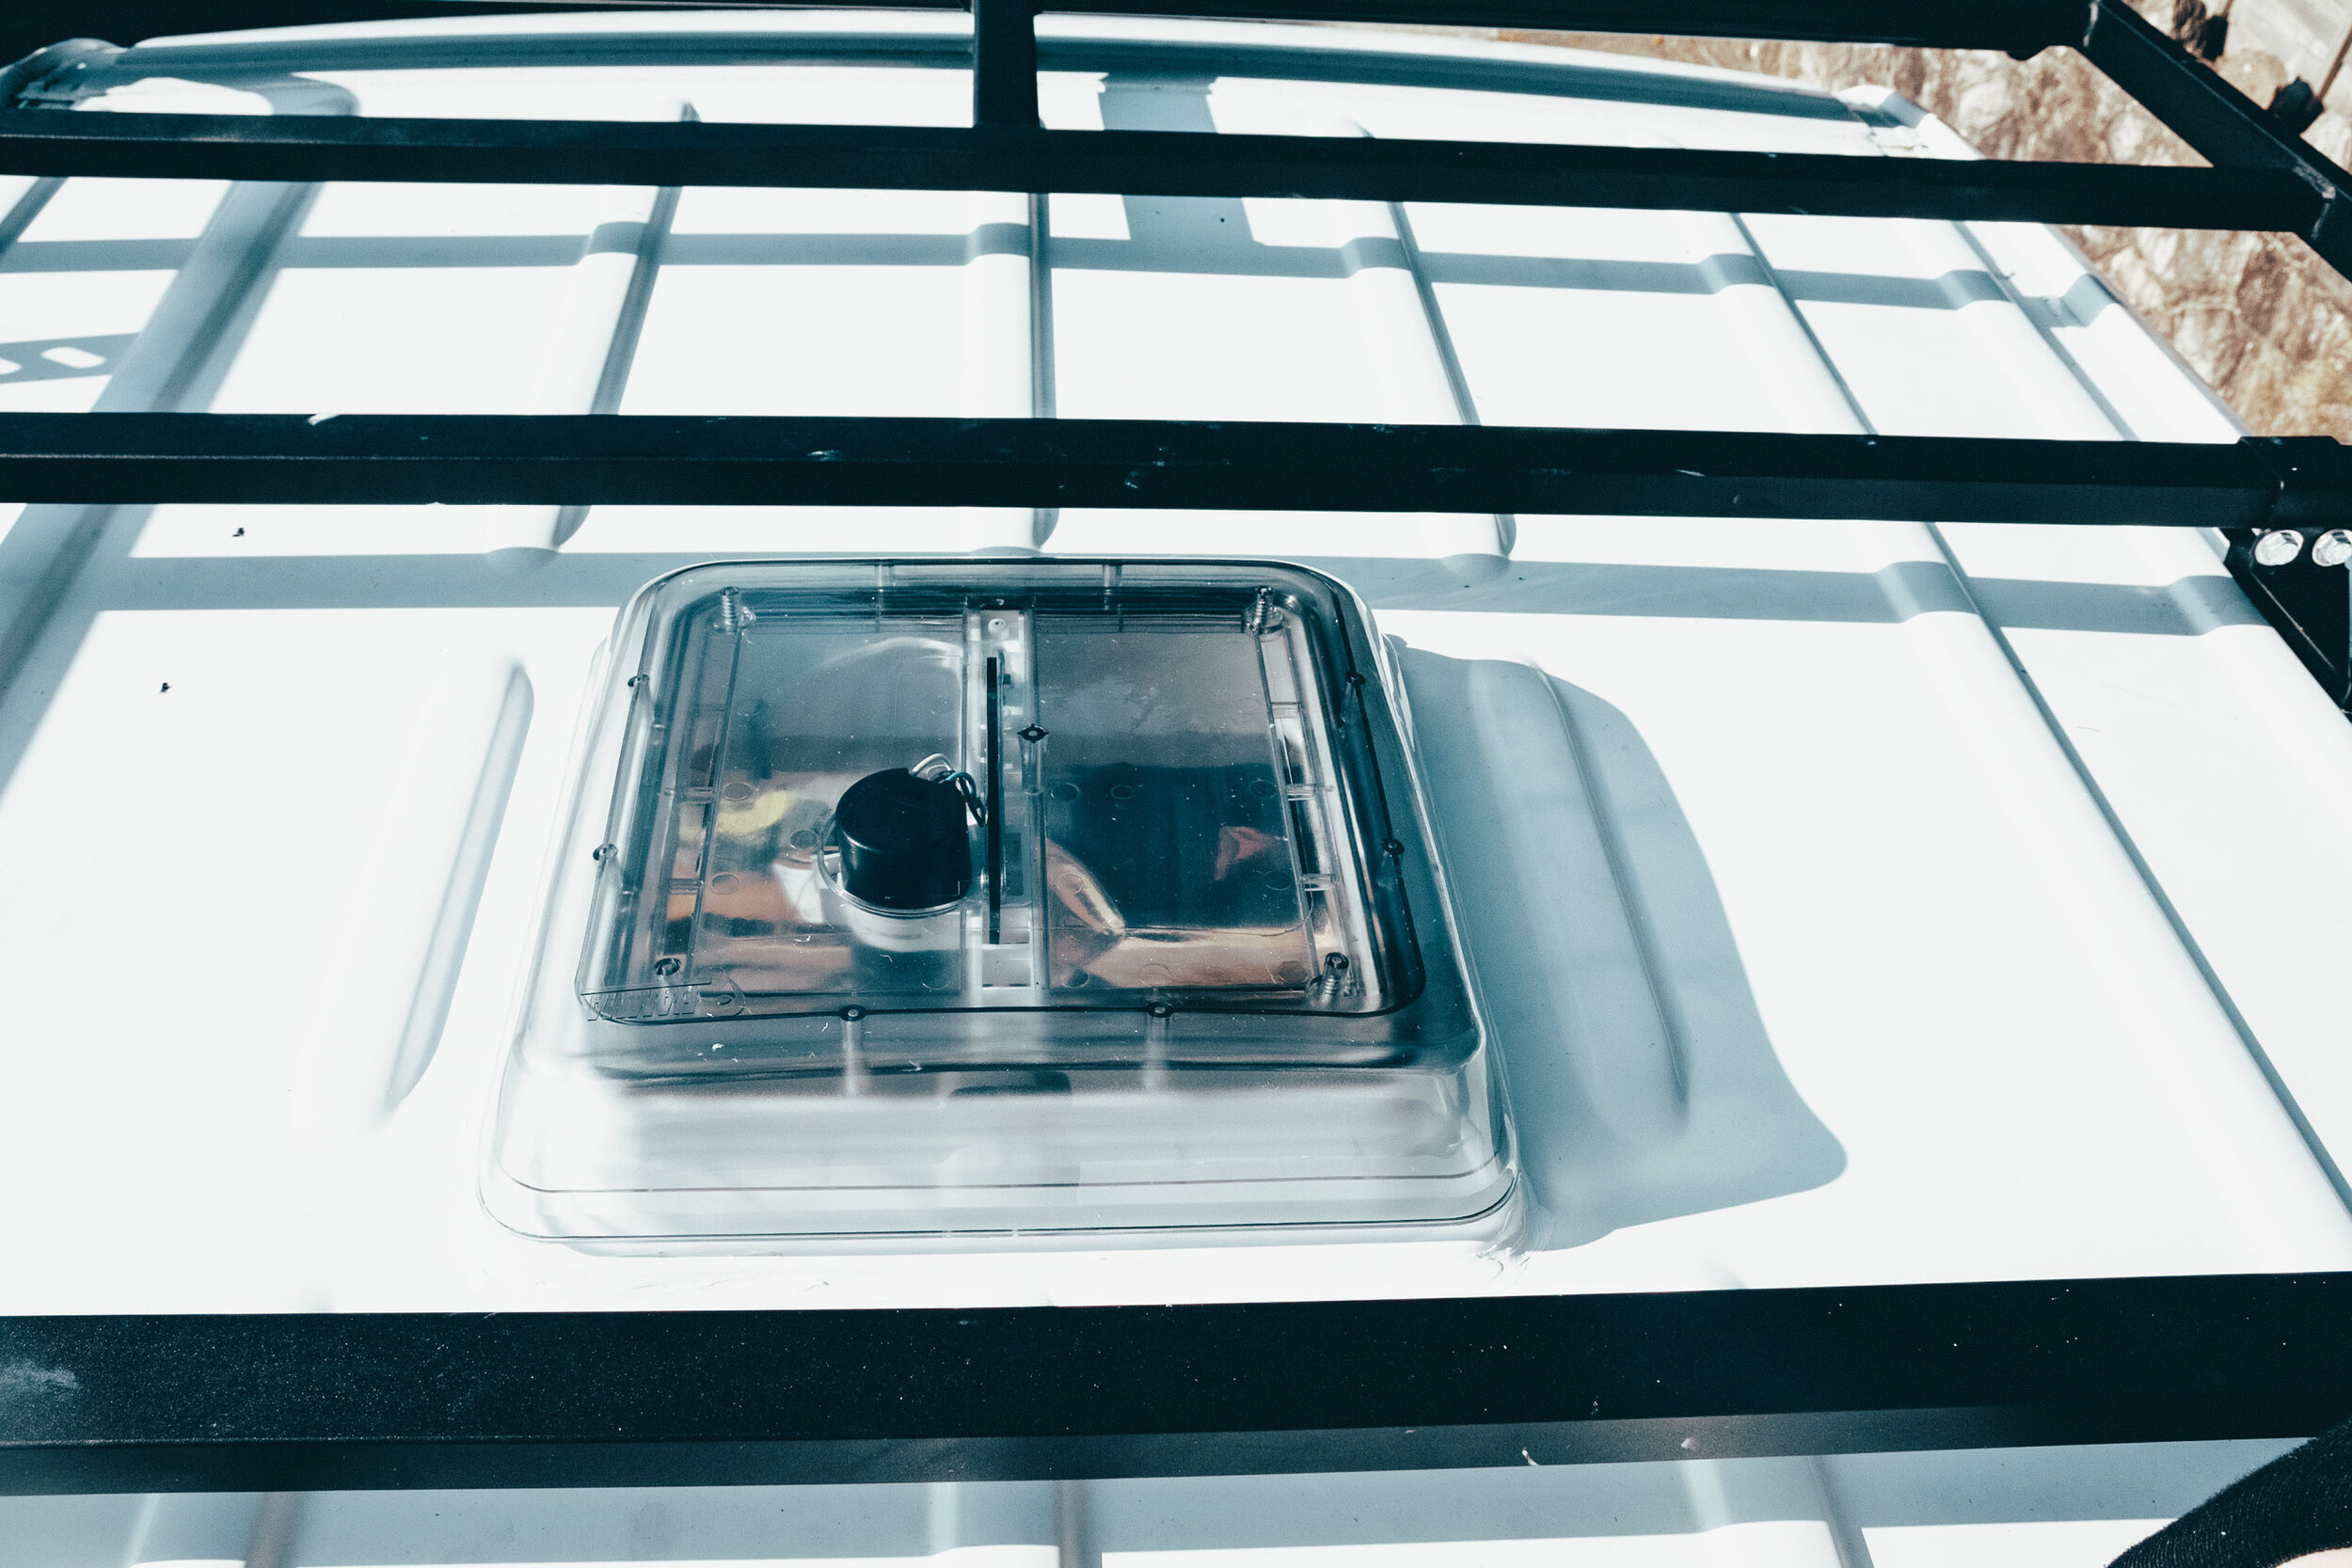
The fan fit perfectly between the bars of the roof rack, and can still open fully
Things are moving along very quickly now, with jobs overlapping and little bits getting done here and there. By the time of me writing this post, there are already some major updates to the interior of the van which I can’t wait to share with you!
What We Used:
Fiamma Turbo Vent 28 in Crystal - https://bit.ly/35R0Vu0
(not an affiliate link)