Van Build Series: Week 3 – Insulating the Walls
Week 3 was a big one! After we’d rust treated and added sound deadening to the van (read our blog on that here) it was time to tackle insulation. Probably the first major job in any van conversion, insulation is an important step you can’t afford to miss out on. Incorrectly insulated vans will not only make your van life miserable on cooler days, but can lead to condensation, mould and eventually rust. The main reasons for insulating your van are to keep heat in and moisture away. We watched so many videos and read so many blogs on van insulation, it felt like we’d already done it. The online world of van insulation can be overwhelming, so I’ll try and keep this as simple but as comprehensive as possible. I won’t go into all the possible ways you can insulate your van, but I will explain what we did and why we did it.
Our Insulation Materials
We chose four main materials to insulate our van. This was because we have parts of the van that suit different types of insulation. For example, we have deep cavities that suit soft insulation and other parts where foamboard is much better. Using a mixture makes certain jobs much quicker and gives more thorough insulation to the van.

Loft Insulation
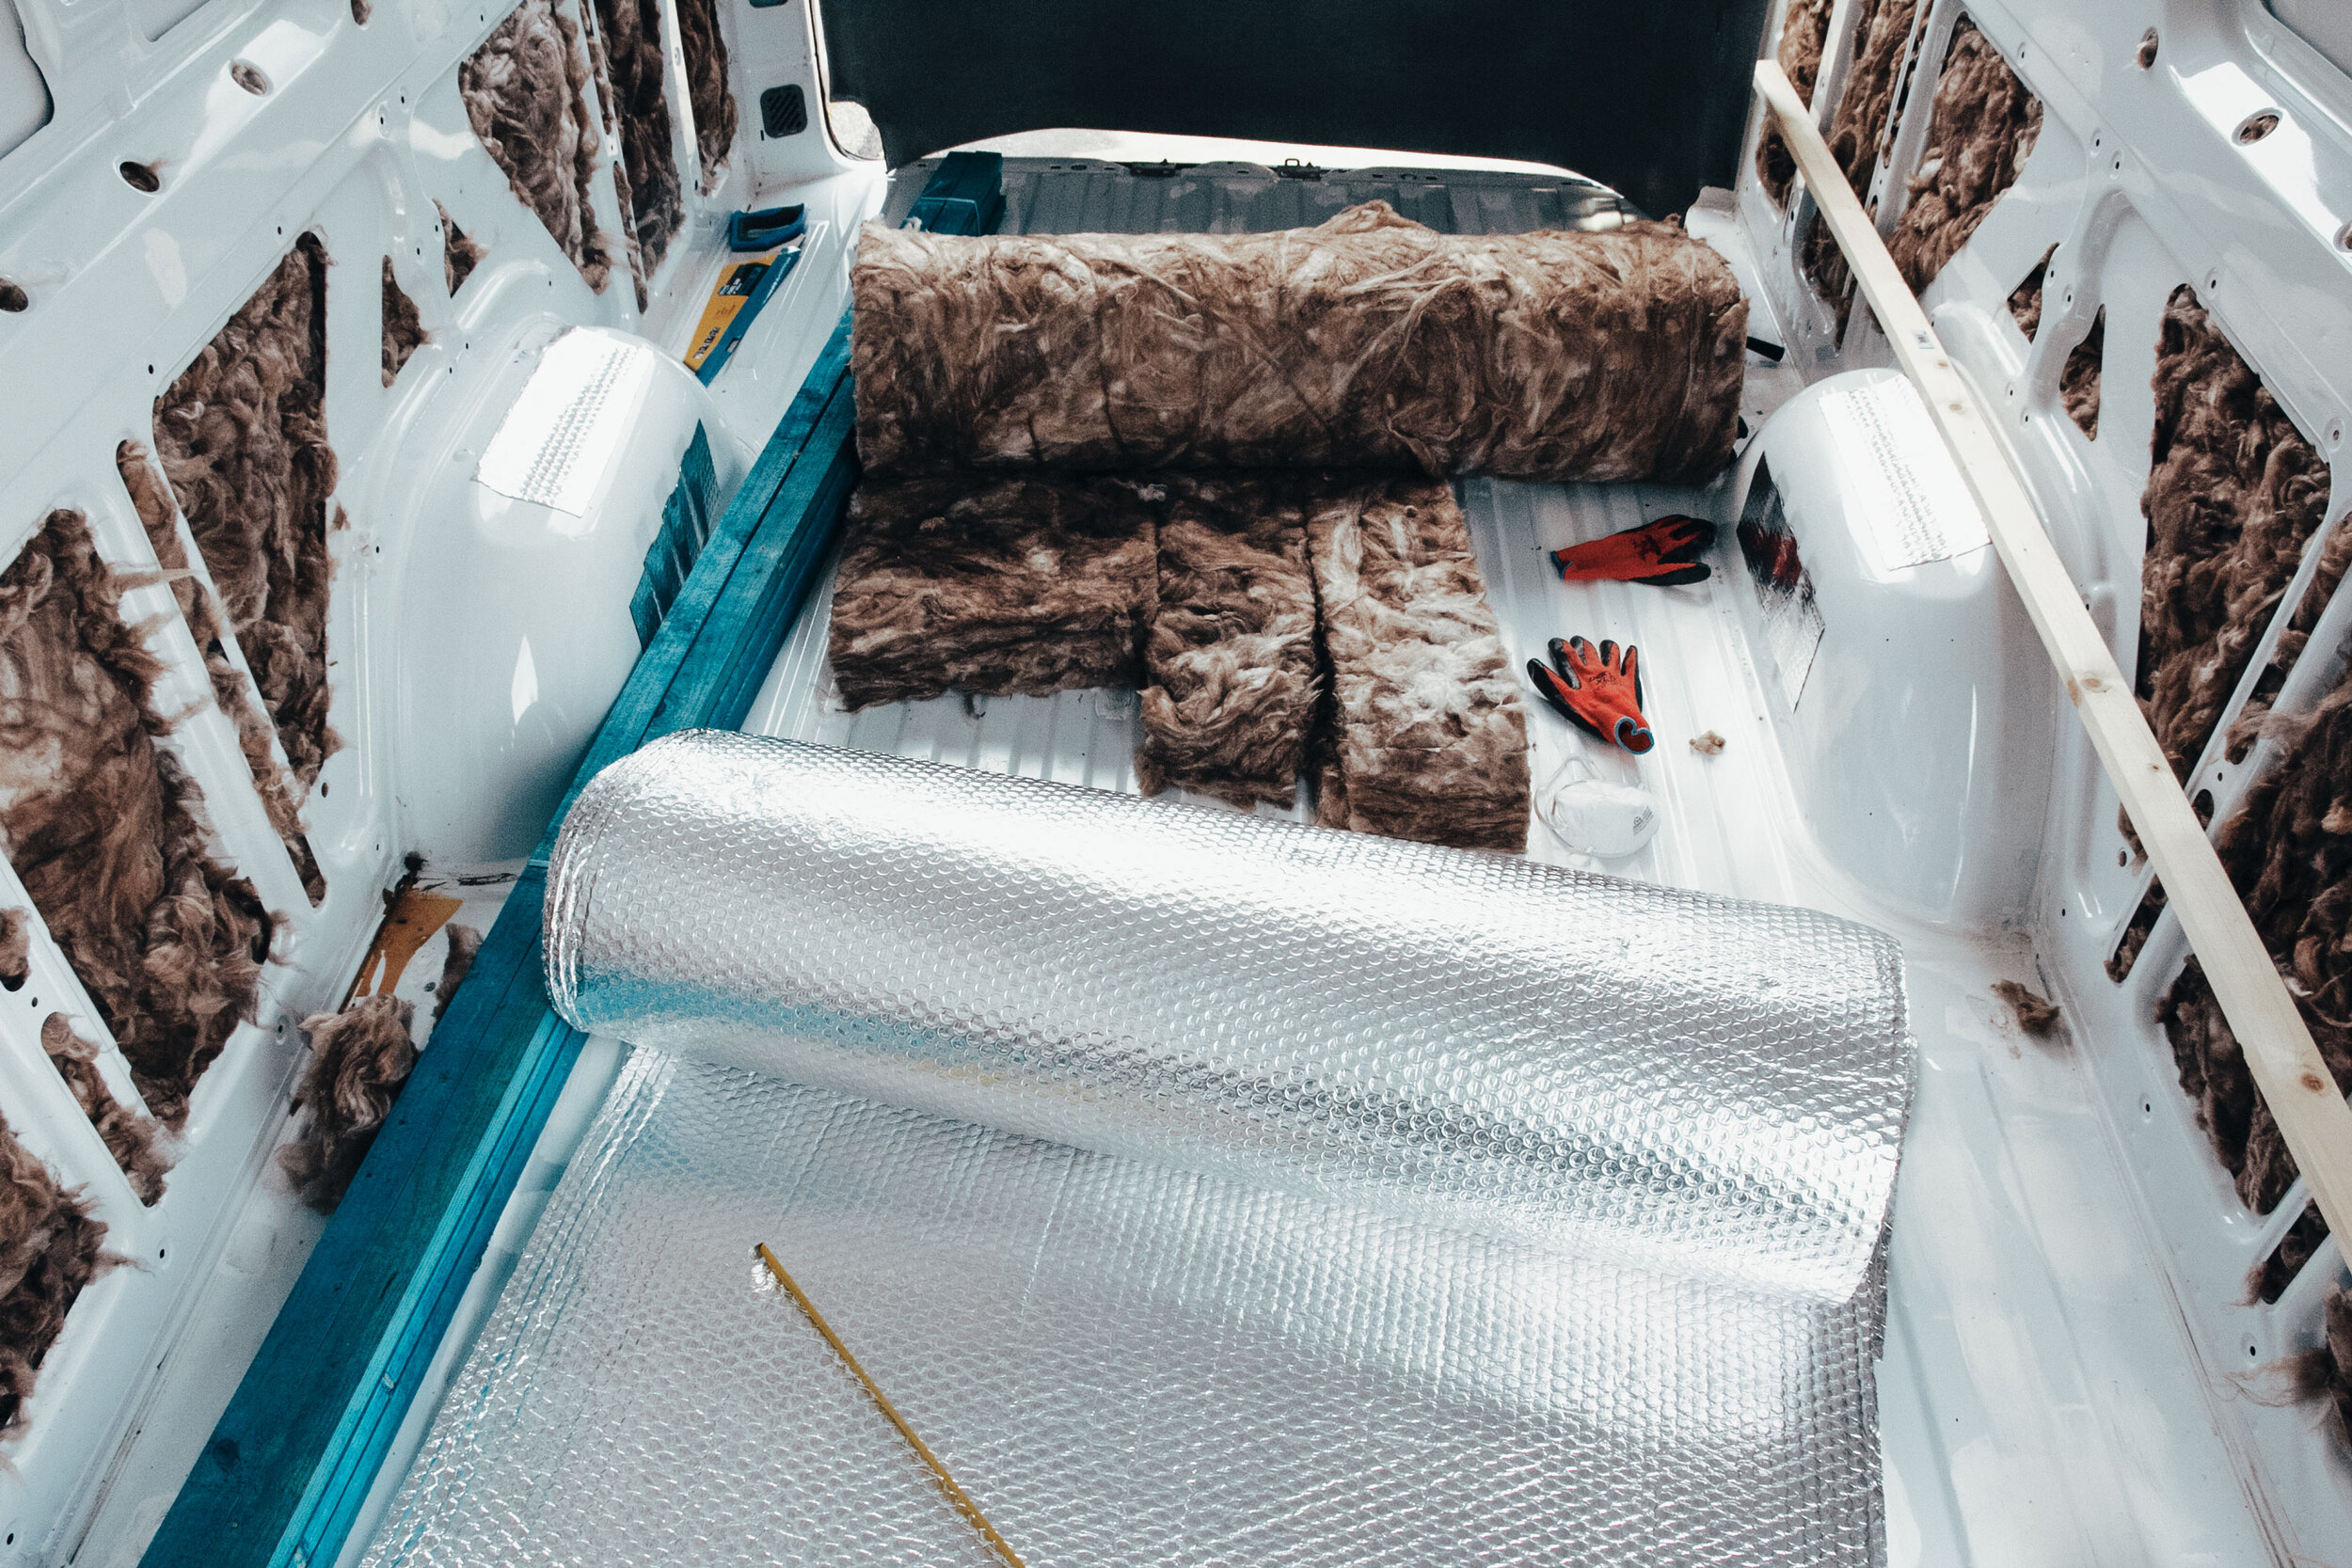
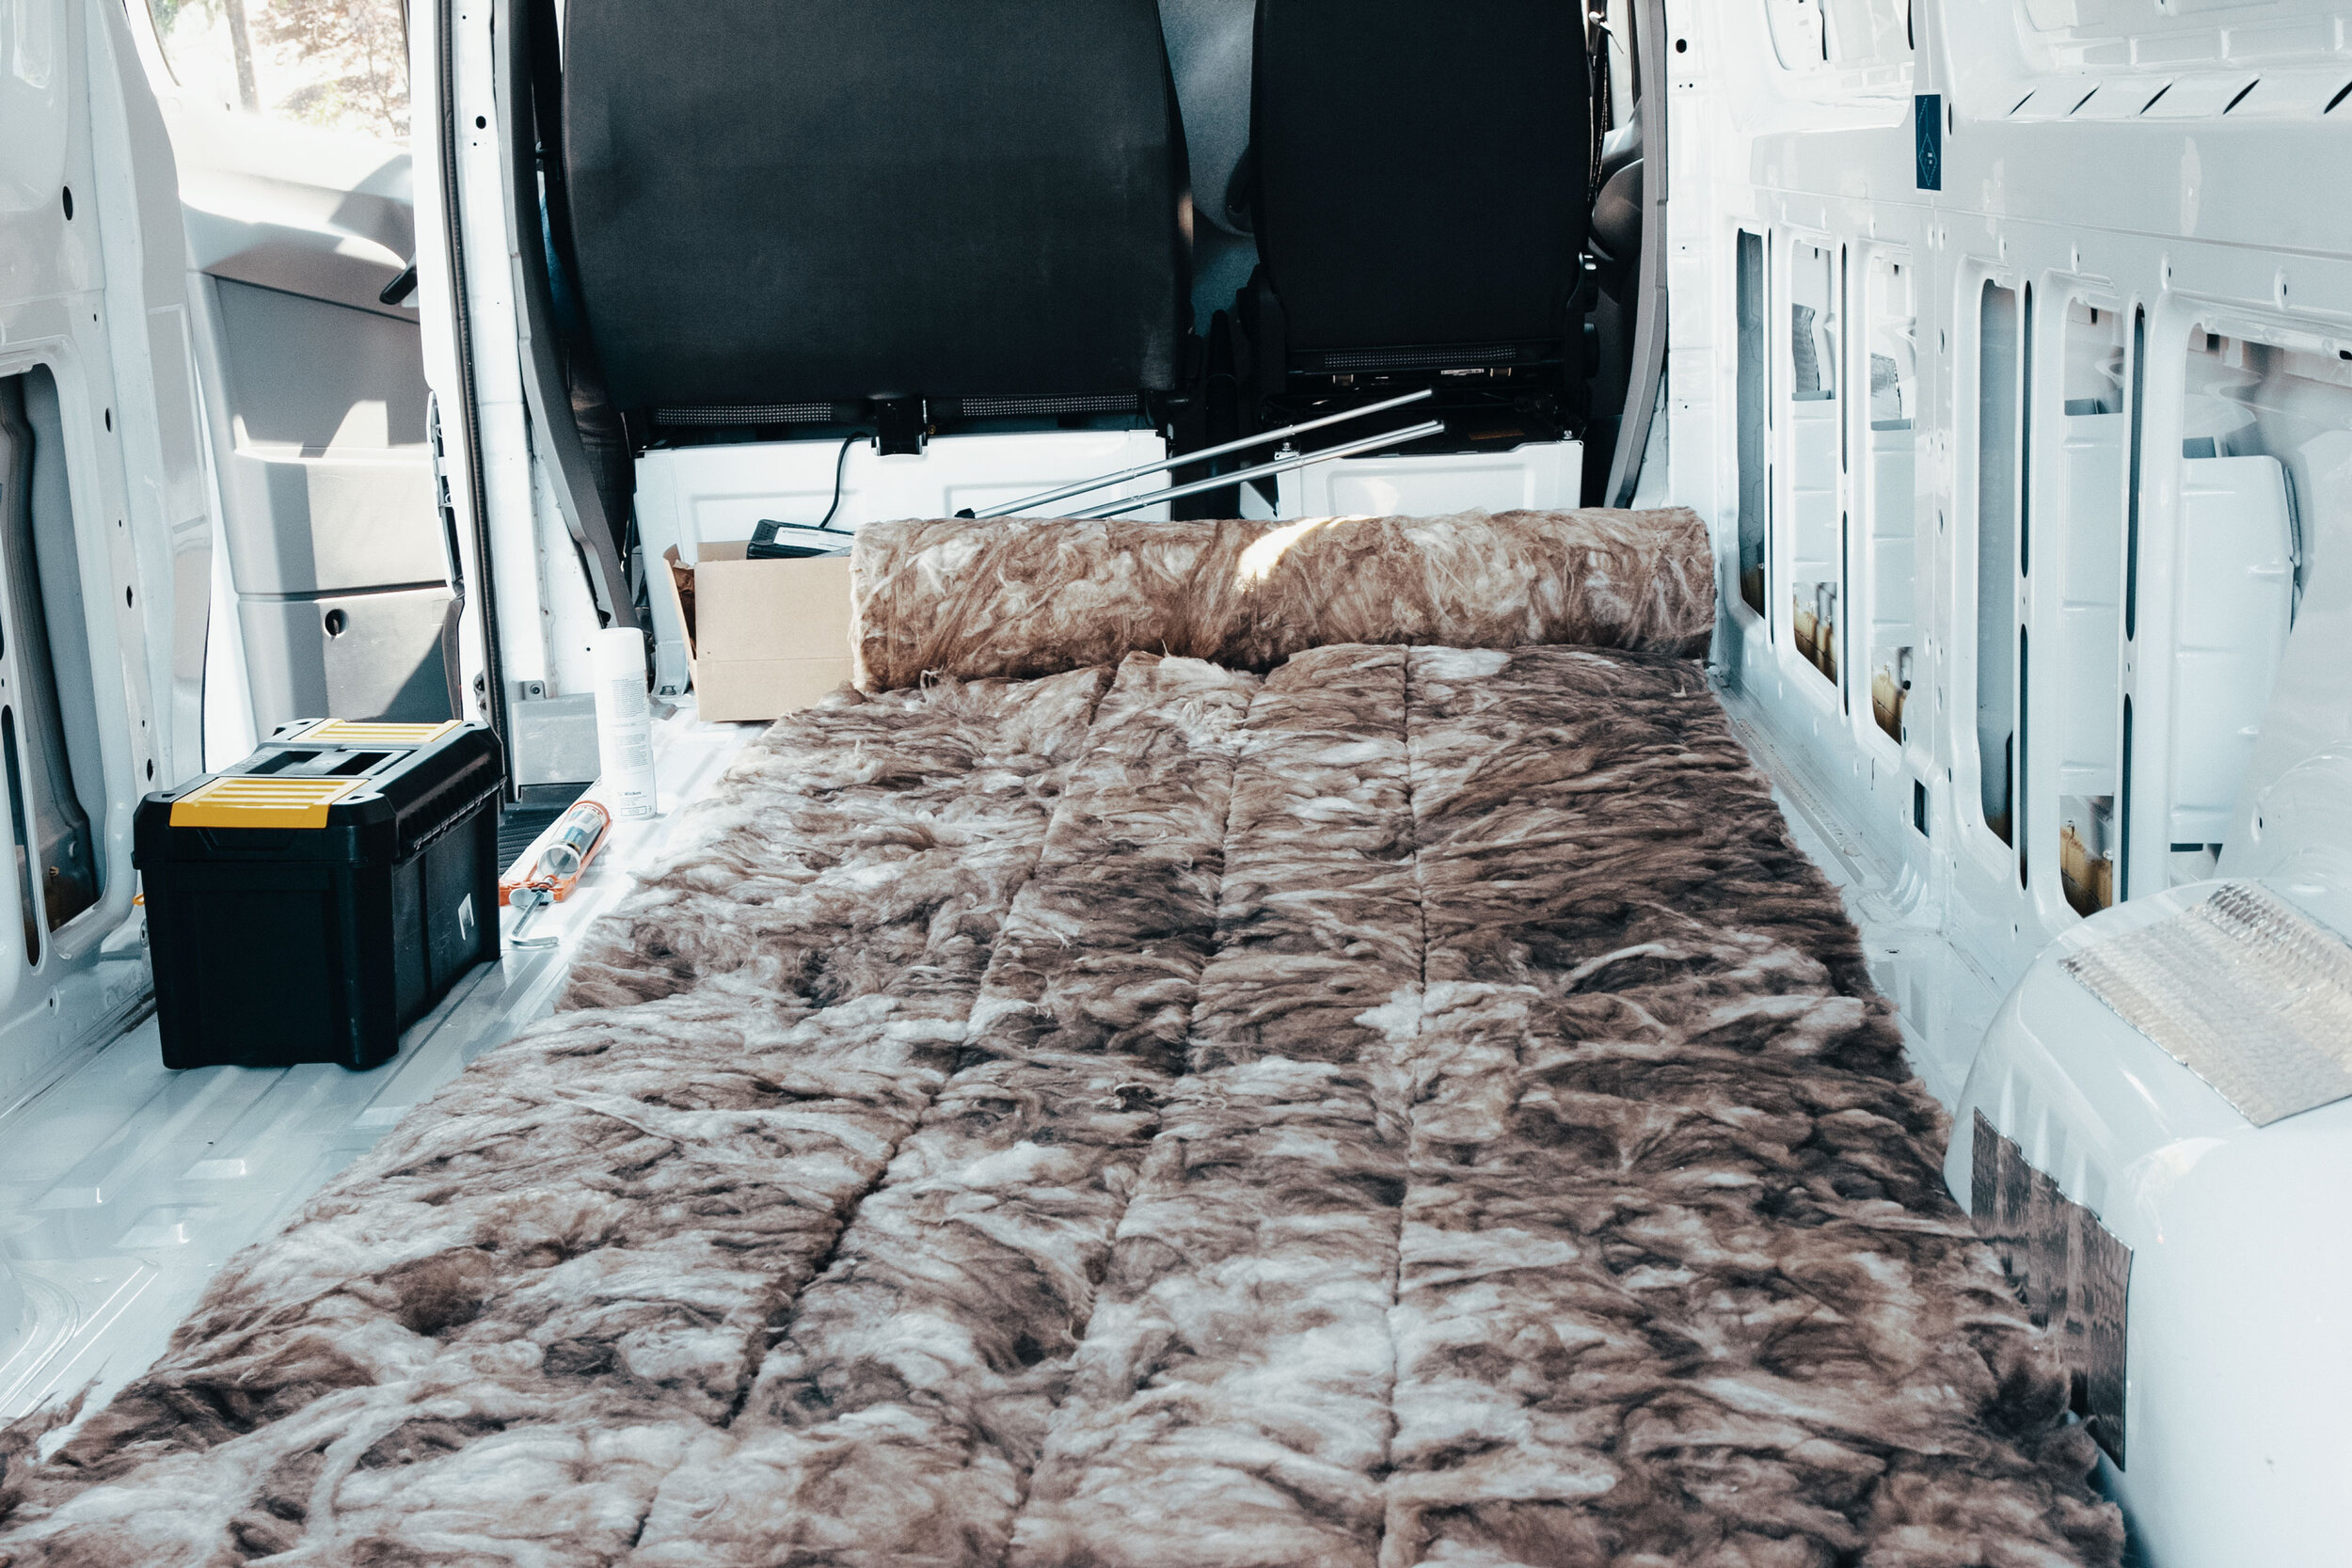
We used recycled loft insulation to fill in the deep cavities of the walls of the van, including the panels on the back doors and the sliding door. This was the first step in our insulation job and took a lot longer than we expected! Even though the loft insulation was harmless (no fibre glass etc), it still shed fibres, making it uncomfortable even with a mask and gloves. I know you can buy a soft insulation called Superloft which looks much cleaner to use. However, loft insulation was great for tearing up and getting deep into the cavities of the van behind the panels etc. Superloft looks pretty compact so I’d imagine you’d use a lot of it trying to get it in all the nooks and crannies. Not the end of the world but something to bear in mind. Loft insulation has fantastic insulation properties, pretty much the same as foamboard, so we were happy to use it wherever we could. As the material is porous, you will need to vapour seal it at the end, but I’ll discuss that later on.
Rolled out loft insulation, ready for filling cavities
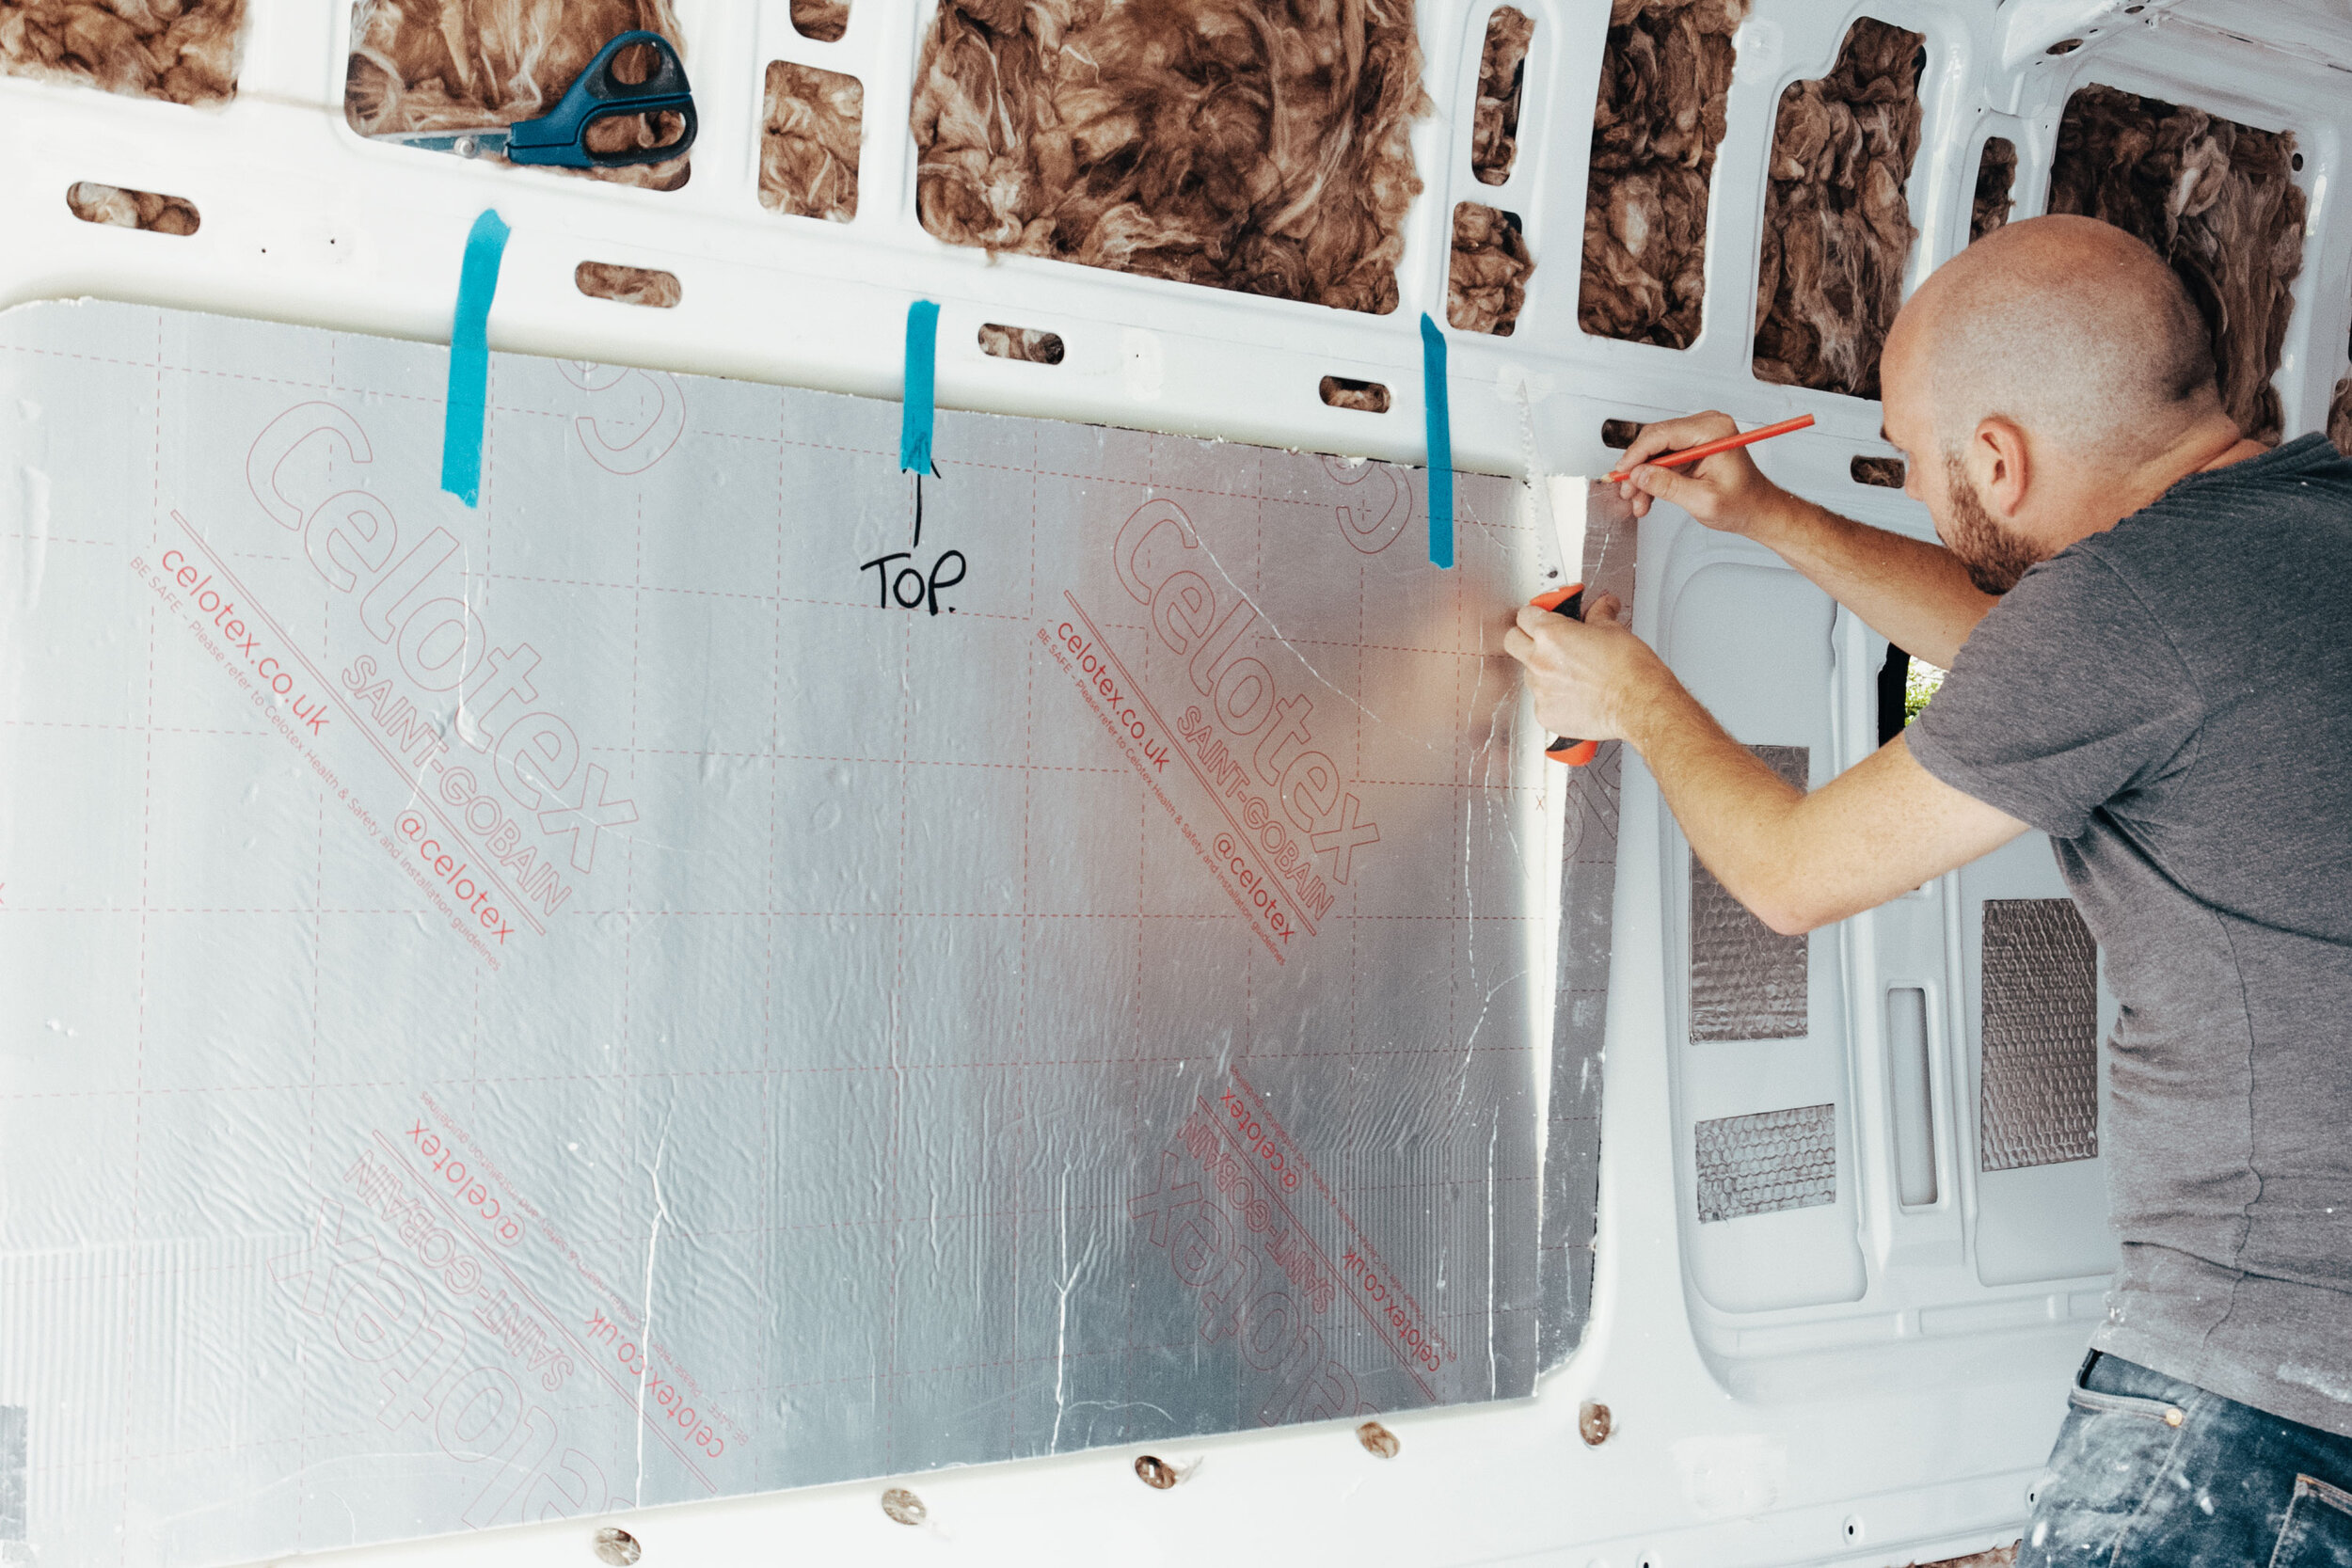
Celotex Foamboard
The king of foamboard insulation, Celotex is used by many people because it’s so effective. We used Celotex in the large side panels of the van. The gap isn’t large enough to use loft insulation, but they fit Celotex board pretty nicely. Celotex comes in very large boards which will need to be stored somewhere dry and eventually cut down to size. We found it a really easy material to work with that’s pretty forgiving on any mistakes! There are 5 panels on our sprinter van, which get shallower the further towards the back of the van you go. For the two panels closest to the back door (one on each side) we used 25mm foamboard, but for the other three, we needed 50mm. We’ll also be using these thicknesses for the floor and ceiling at a later date.

Celotex Foamboard Insulation
Spray Foam
The celotex boards leave a slight gap on the panels, so we used small beads of spray foam to fill in those gaps and to help stick the boards to the van. We’ve read some people use spray foam everywhere because it’s so good at insulating. But for us, it’s the least eco-friendly option, it’s expensive and we’d probably have to get a professional in to put the spray foam everywhere. But it was perfect for tidying up the Celotex.

Spray Foam Insulation
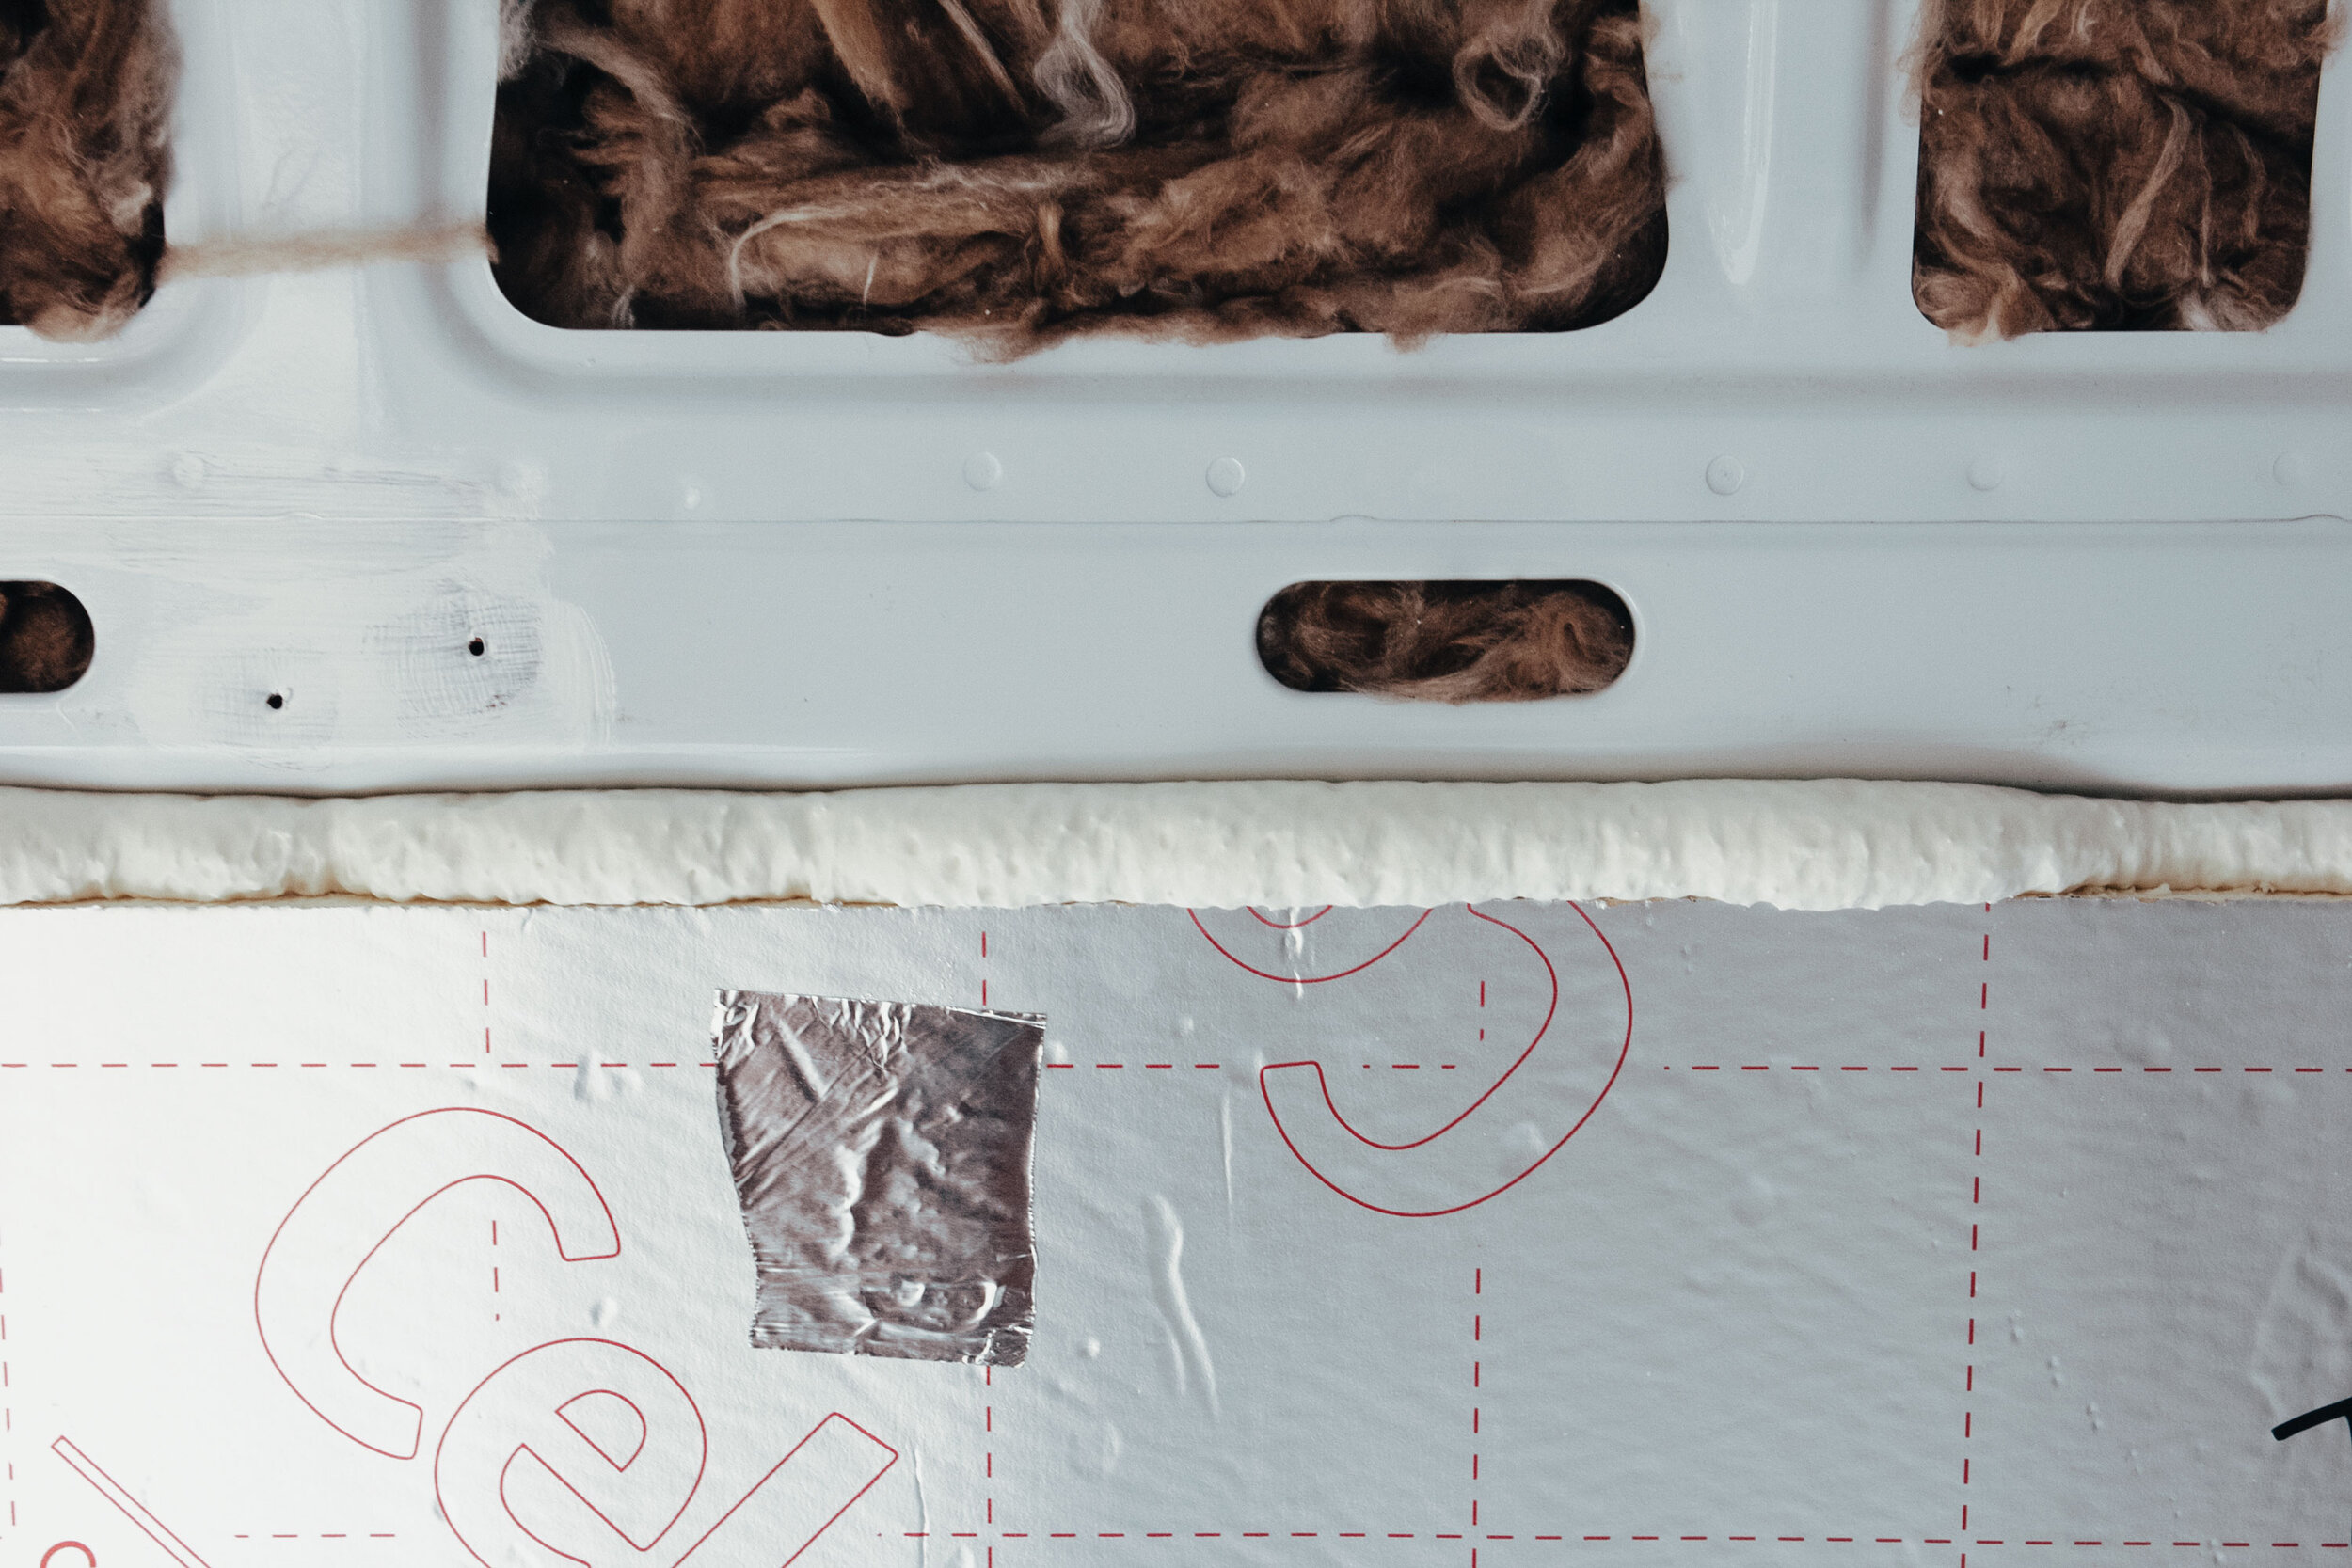
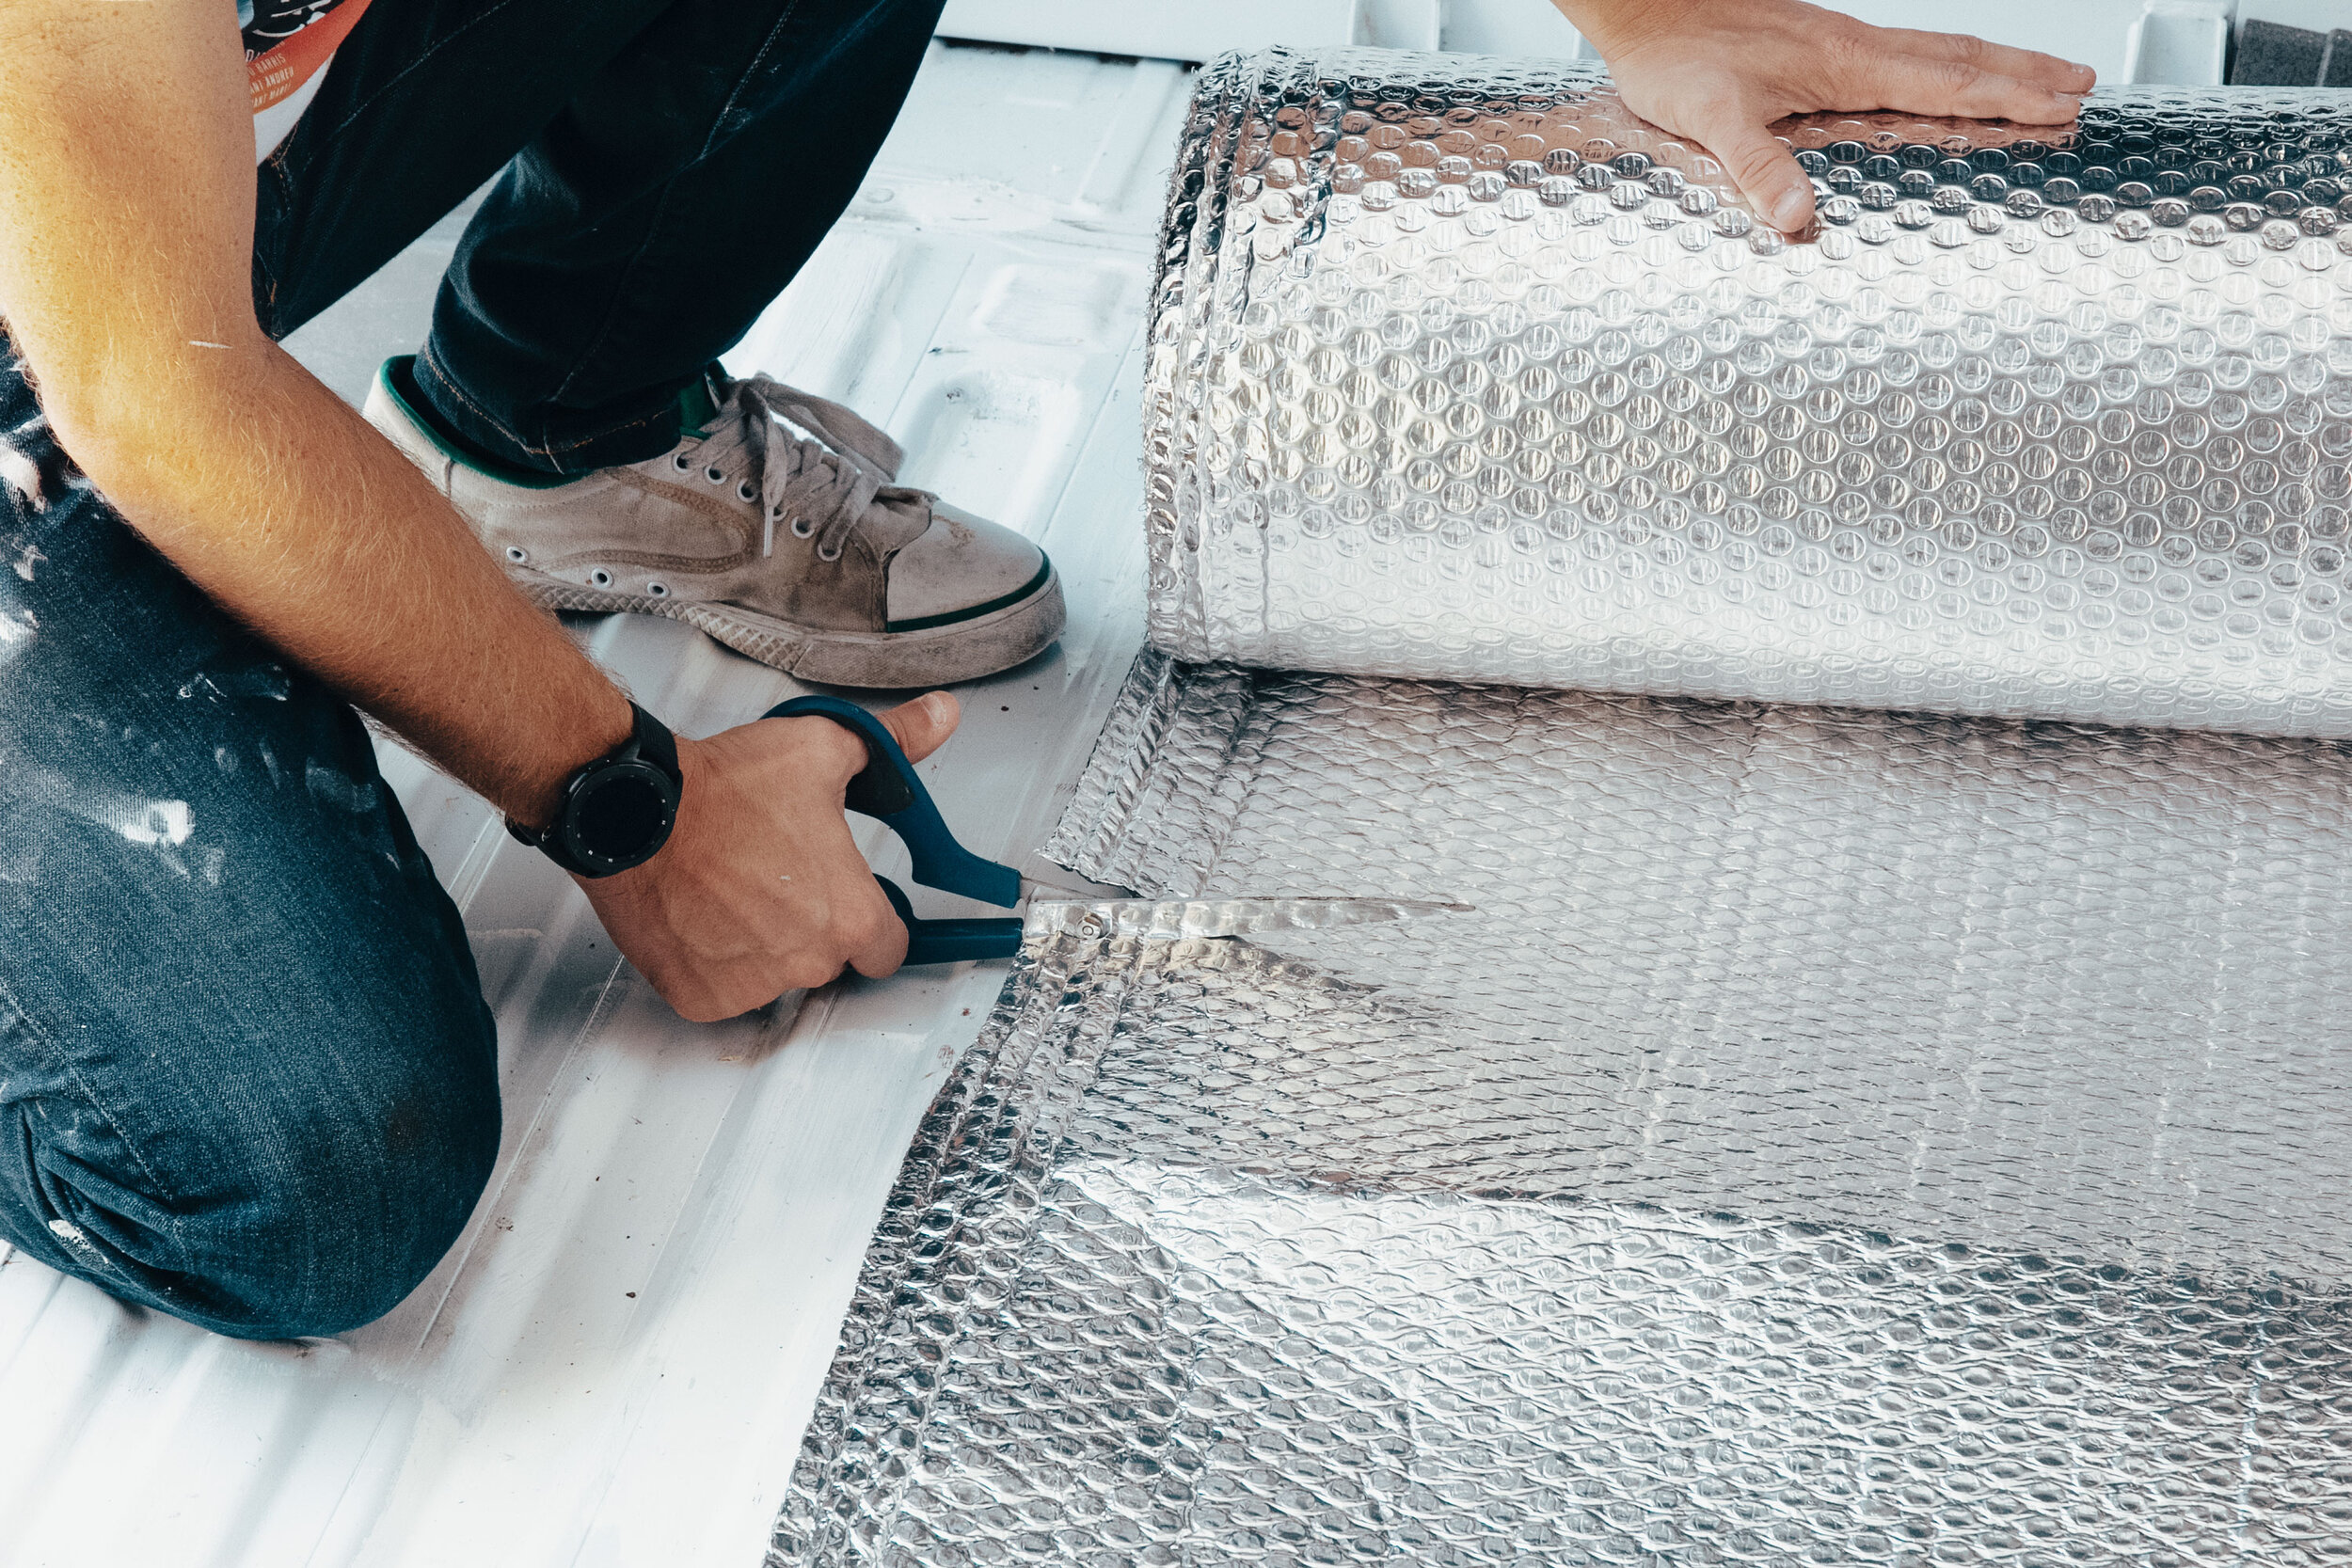
Foil Moisture Barrier & Aluminium Tape
Foil bubble wrap is the final step when insulating your van. It has some insulation properties but is mostly used as a vapour barrier to prevent moisture and cold air from reaching the metal body of your van. This is really important to prevent condensation. It needs to be completely sealed with aluminium tape to be effective, creating a complete vapour seal in your van. It seems some people love using foil bubble wrap instead of other types of insulation, wrapping it all over the inside of their van and sticking it to the metal bodywork. While this works as a moisture barrier, it pretty much renders the foil bubble wrap useless in keeping the van warm. It needs a small space between the metal and the foil, as this is where it traps heat. Sticking it directly to the metal prevents this from happening and can actually deflect heat away from your van and onto the outside bodywork. We used double sided tape to at the top and bottom to create the air gap once it was stuck down.

Foil Bubble Wrap with Aluminium Foil Tape
Step by Step
1. Fill in the top cavities & doors
The first thing we did was use our loft insulation to fill in the cavities at the top and bottom of the walls, as well as the sliding door and back doors. These go back quite some way behind the panel of the van, so we had to stuff quite a lot in there to get good coverage. Bear in mind that loft insulation only works when it has space, so avoid squashing it down as much as you can. We used this in the sliding door panel, removing the plastic covering and tucking in the insulation around the wires. We also put soft insulation in the rear door panels, using a spray adhesive to help it stick down.

Using spray adhesive to make sure the loft insulation stays in place

Mask? Check. Gloves? Check. Big smile? You bet!
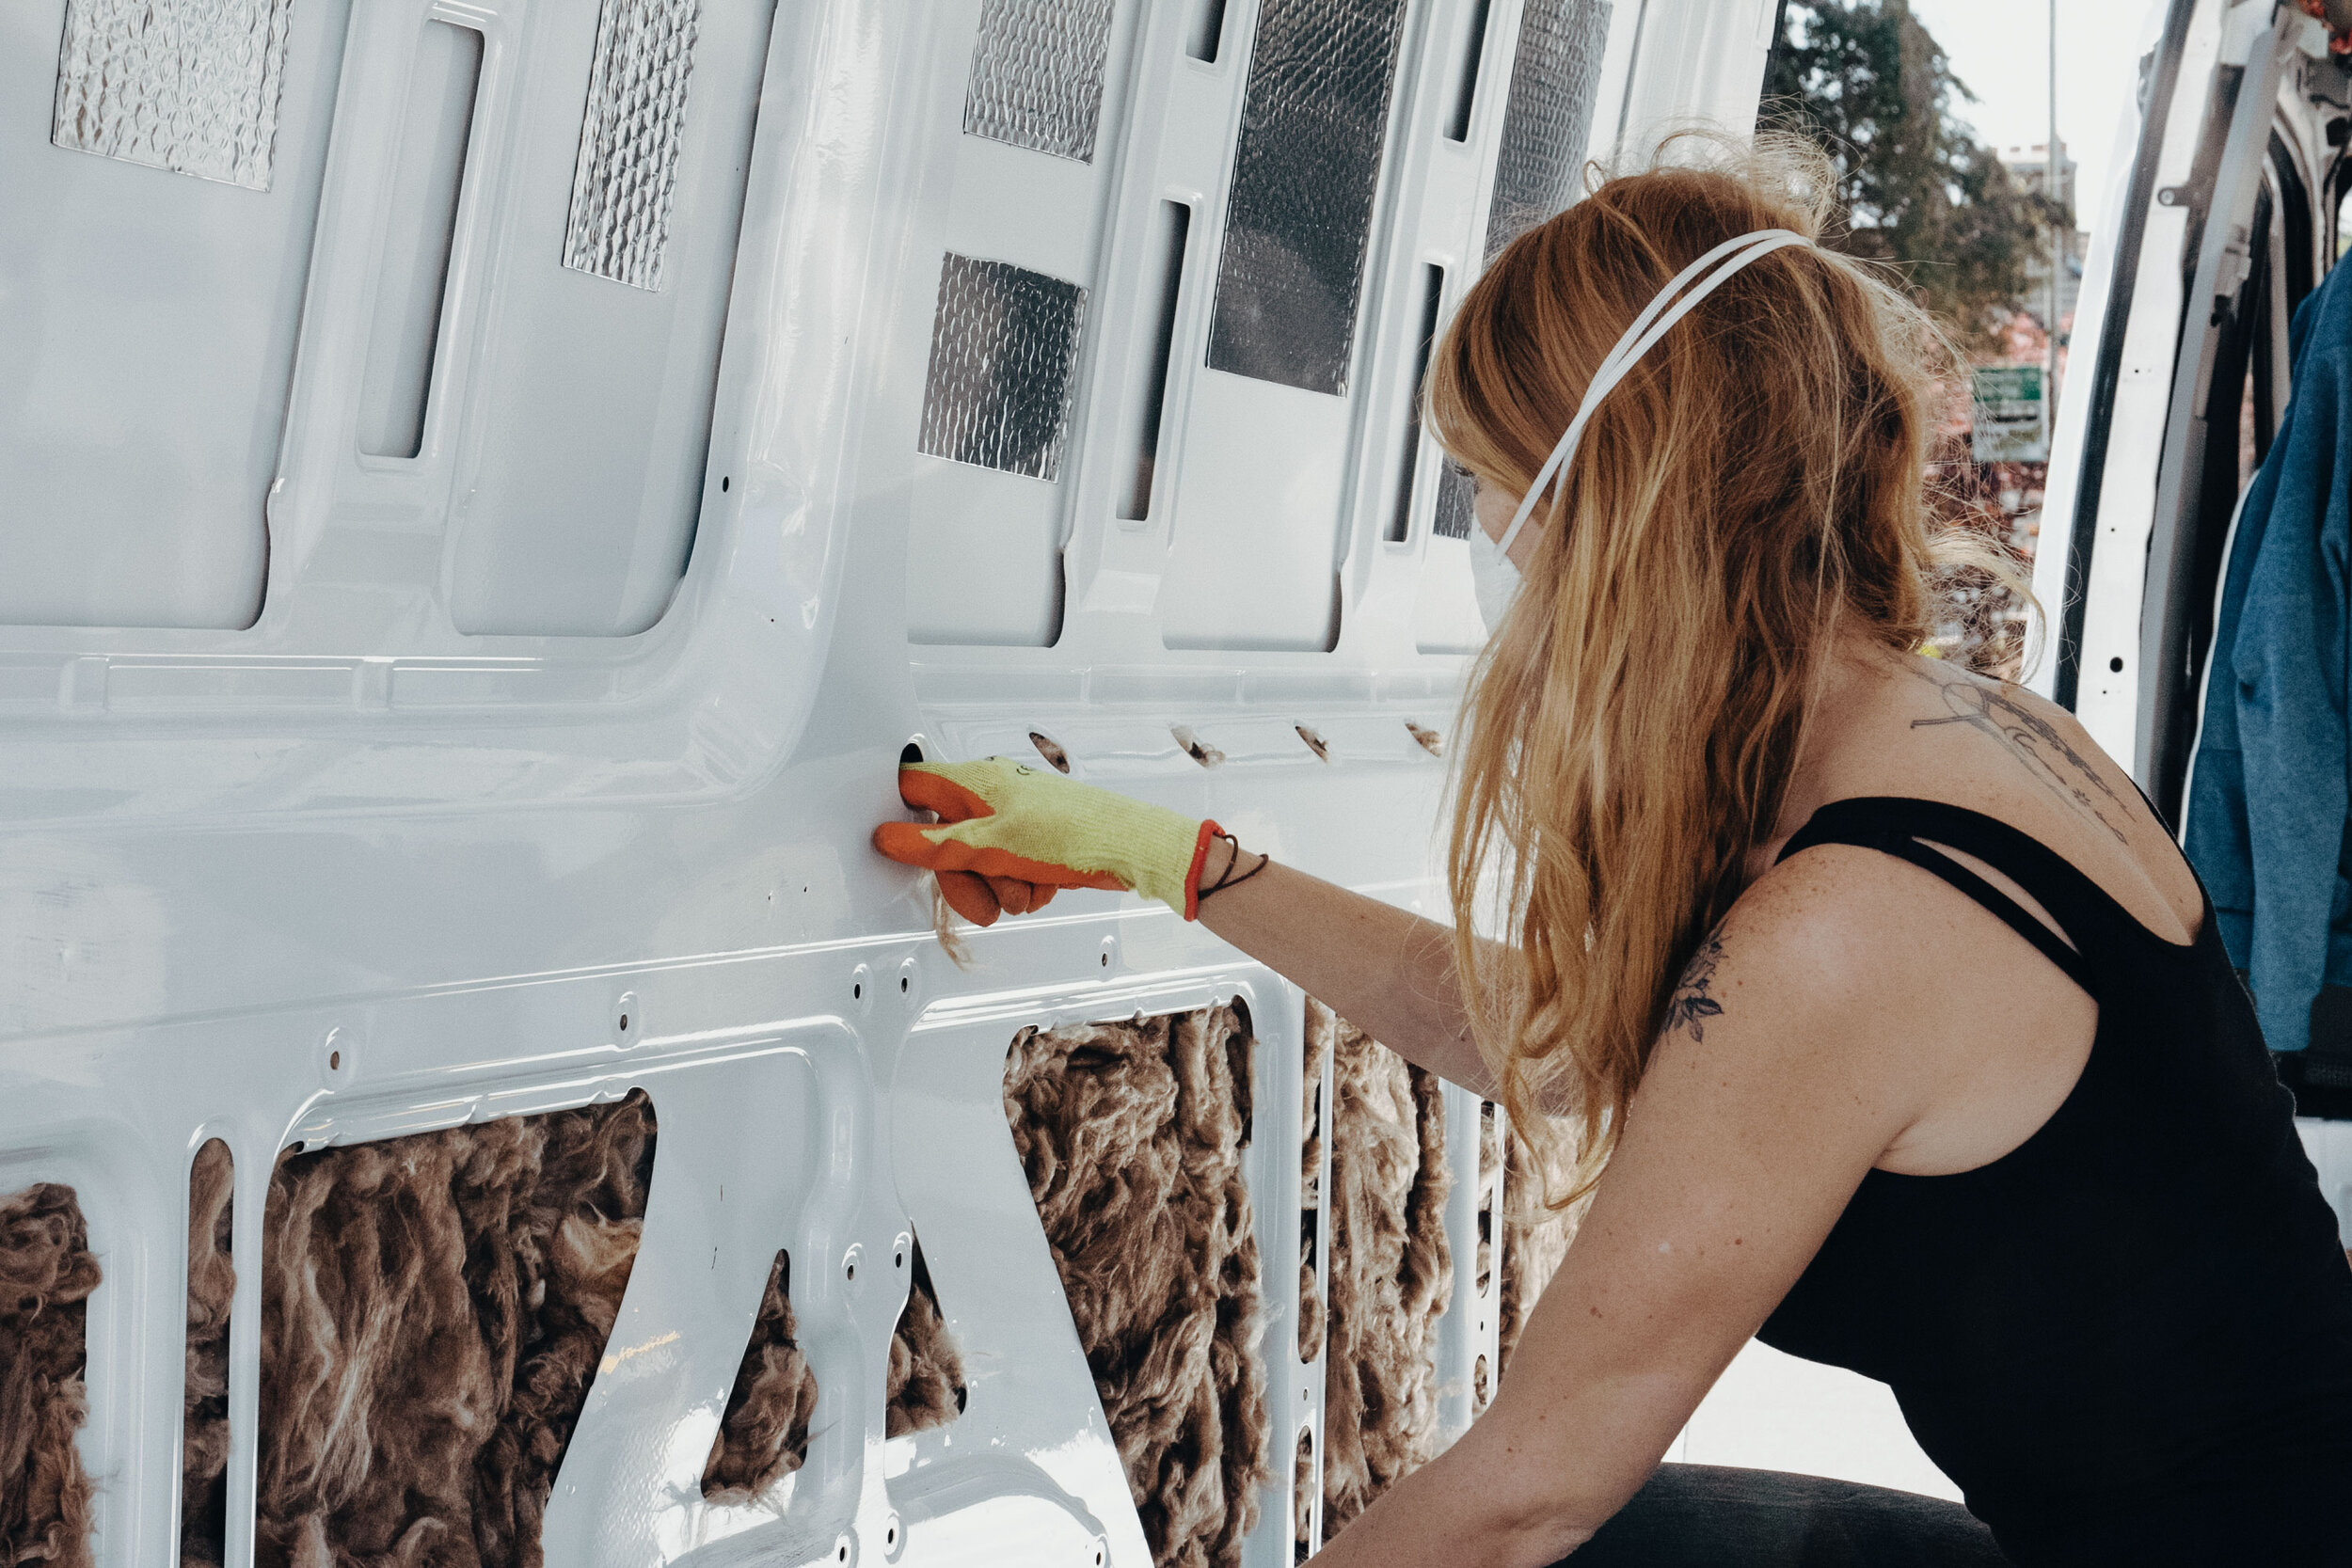
Stuffing the cavities, including those annoying little holes

Soft insulation in the top cavities
2. Cut & stick Celotex to panels
Once the soft insulation was in, we measured out the side panels for the celotex. We cut them as squares, rounding off the corners with a serrated knife until we got the best fit. This took some trial and error and we definitely got better at it the more we did! Once we were happy with the size and shape of the celotex, we used spray adhesive to stick it to the van, holding it in place with small strips of masking tape to help it hold. As I mentioned above, we used 50mm for three of the panels and 25mm for the two back panels closest to the back doors, as these are much shallower.

Cutting the celotex to size
Trimming the foamboard to size isn’t difficult

Making sure it’s roughly the right size
Tidying up some areas where it didn’t fit quite right

Using tape to hold the celotex in place while the spray adhesive dries

A full celotex board in place on the panels
3. Spray foam any gaps in Celotex
You’ll notice that the celotex might not sit flush within the panel, so we used a small bead of spray foam to seal the edge of the celotex. As well as providing more insulation, the spray foam is an adhesive and helps the celotex stick firmly to the wall. Once the spray foam was dry, we shaved off any excess with a small knife

Putting spray foam to seal the celotex to the panels
The finished spray foaming
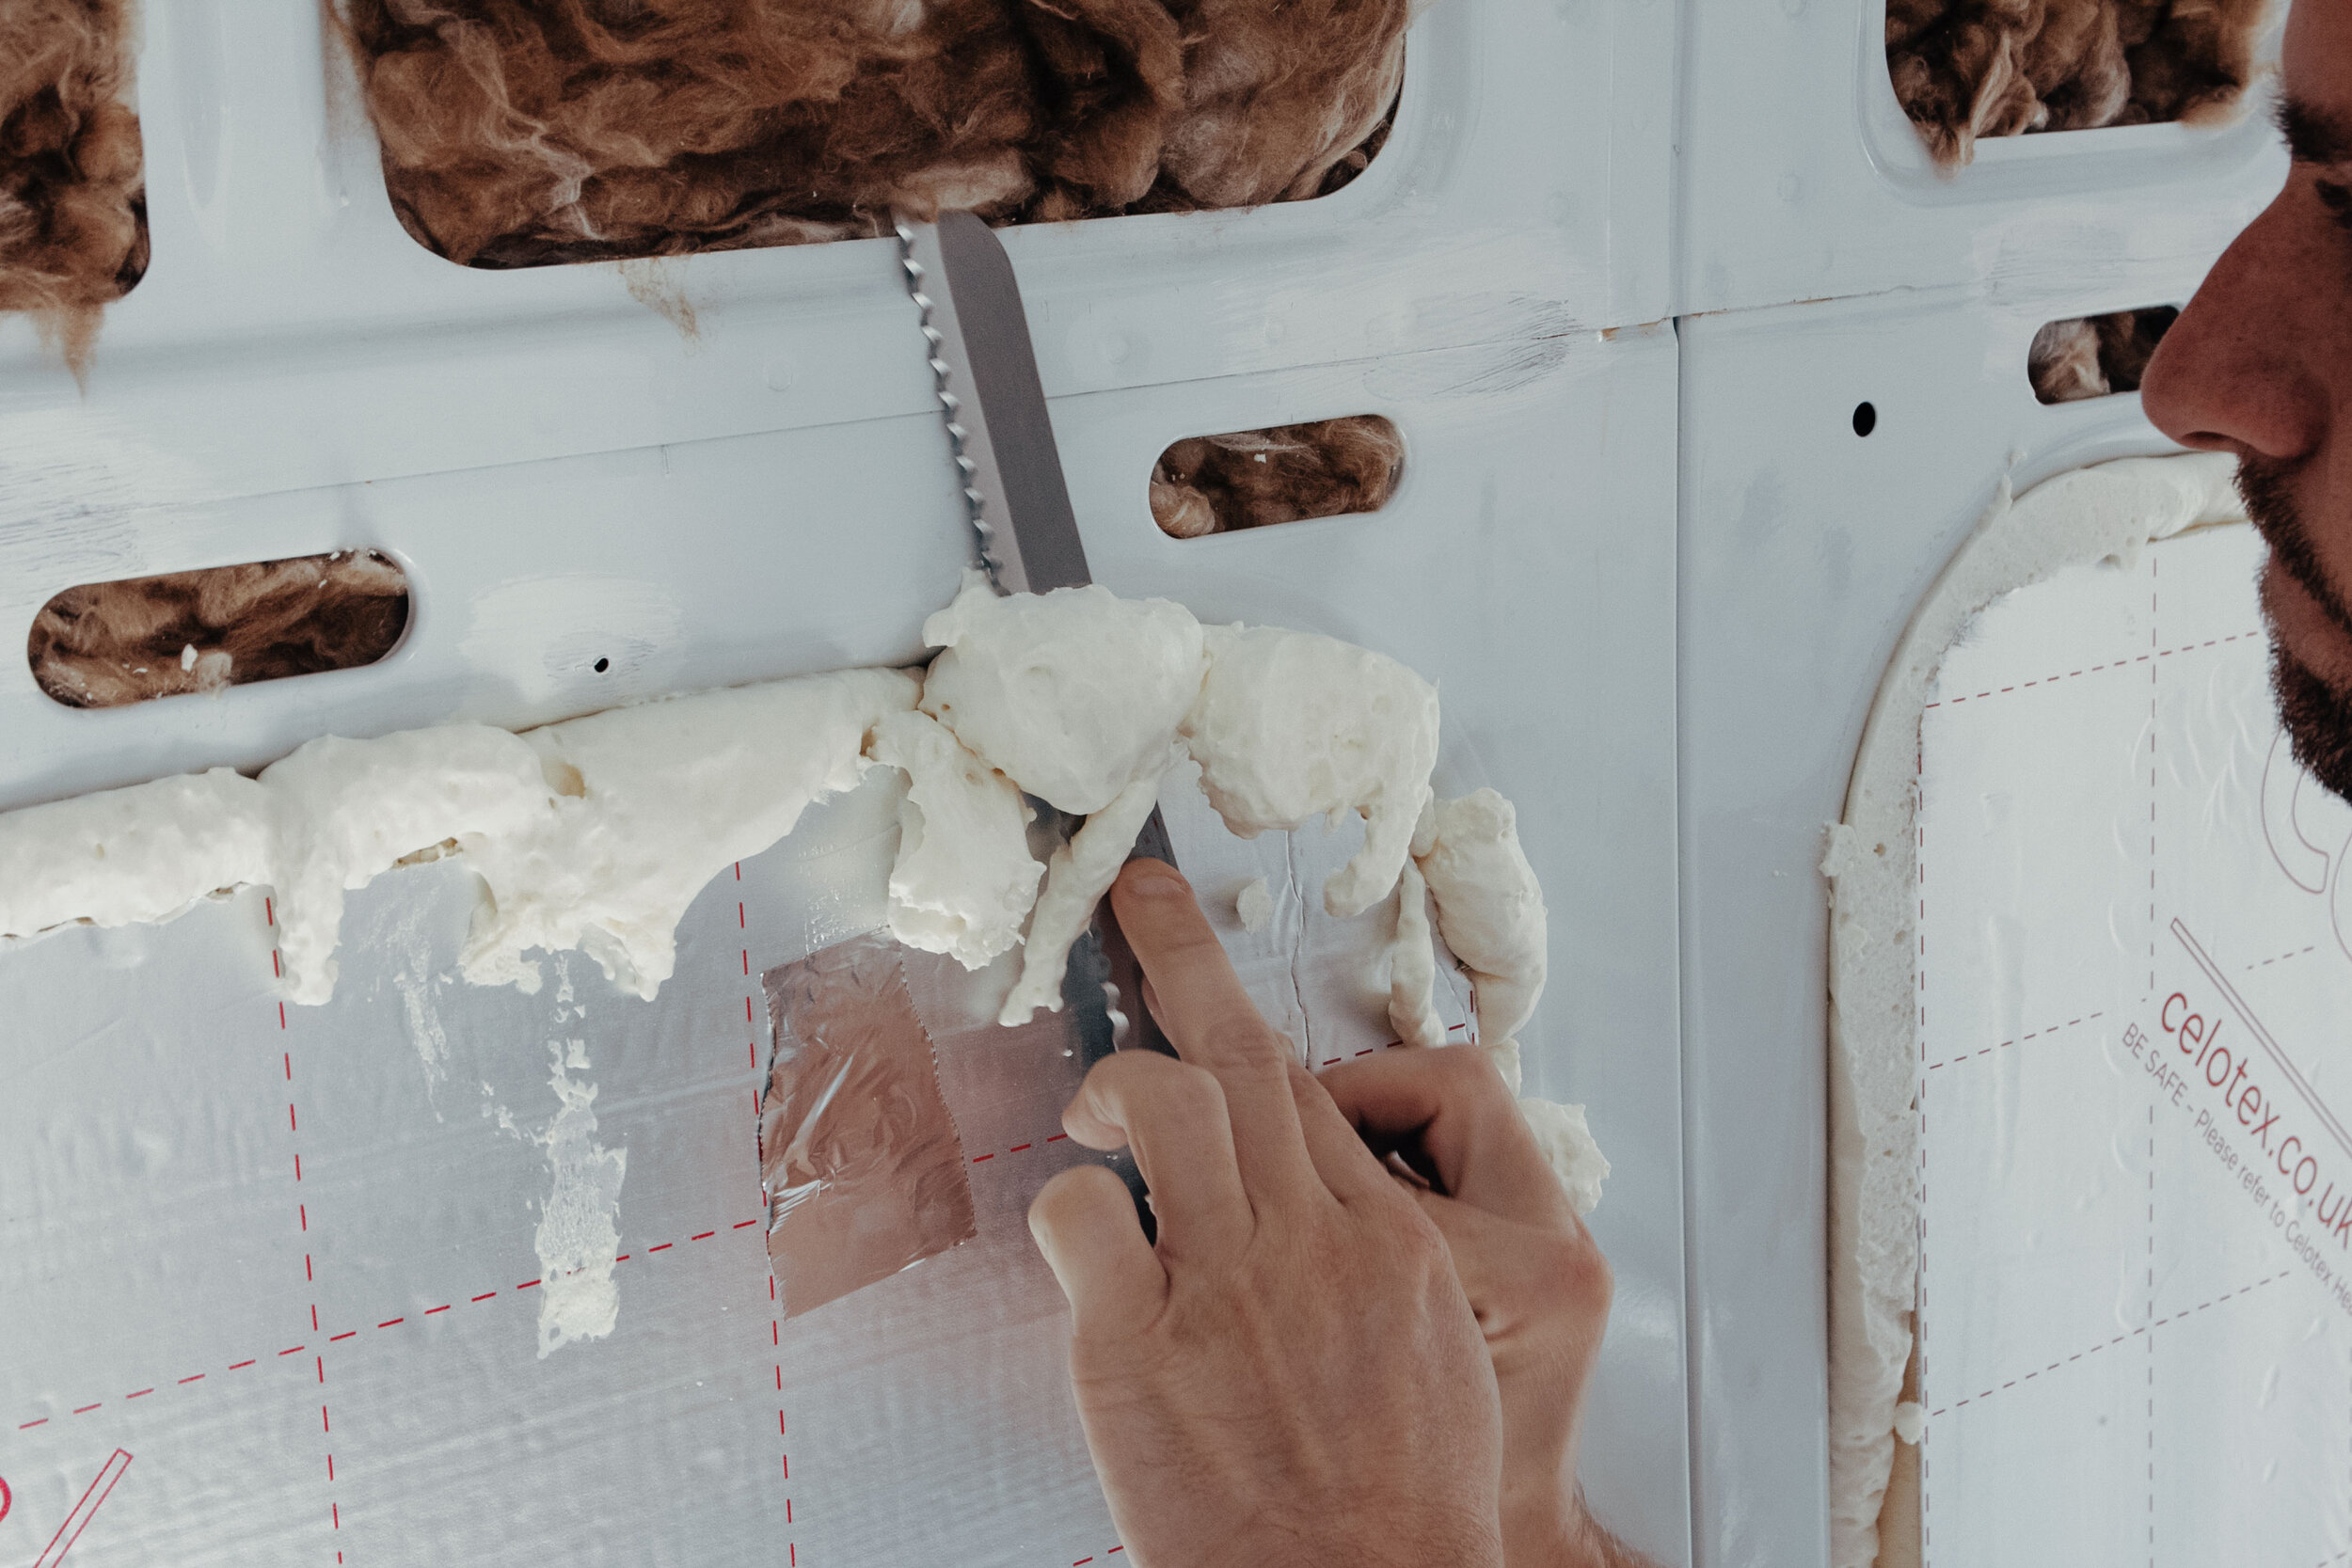
Removing excess spray foam with a kitchen knife
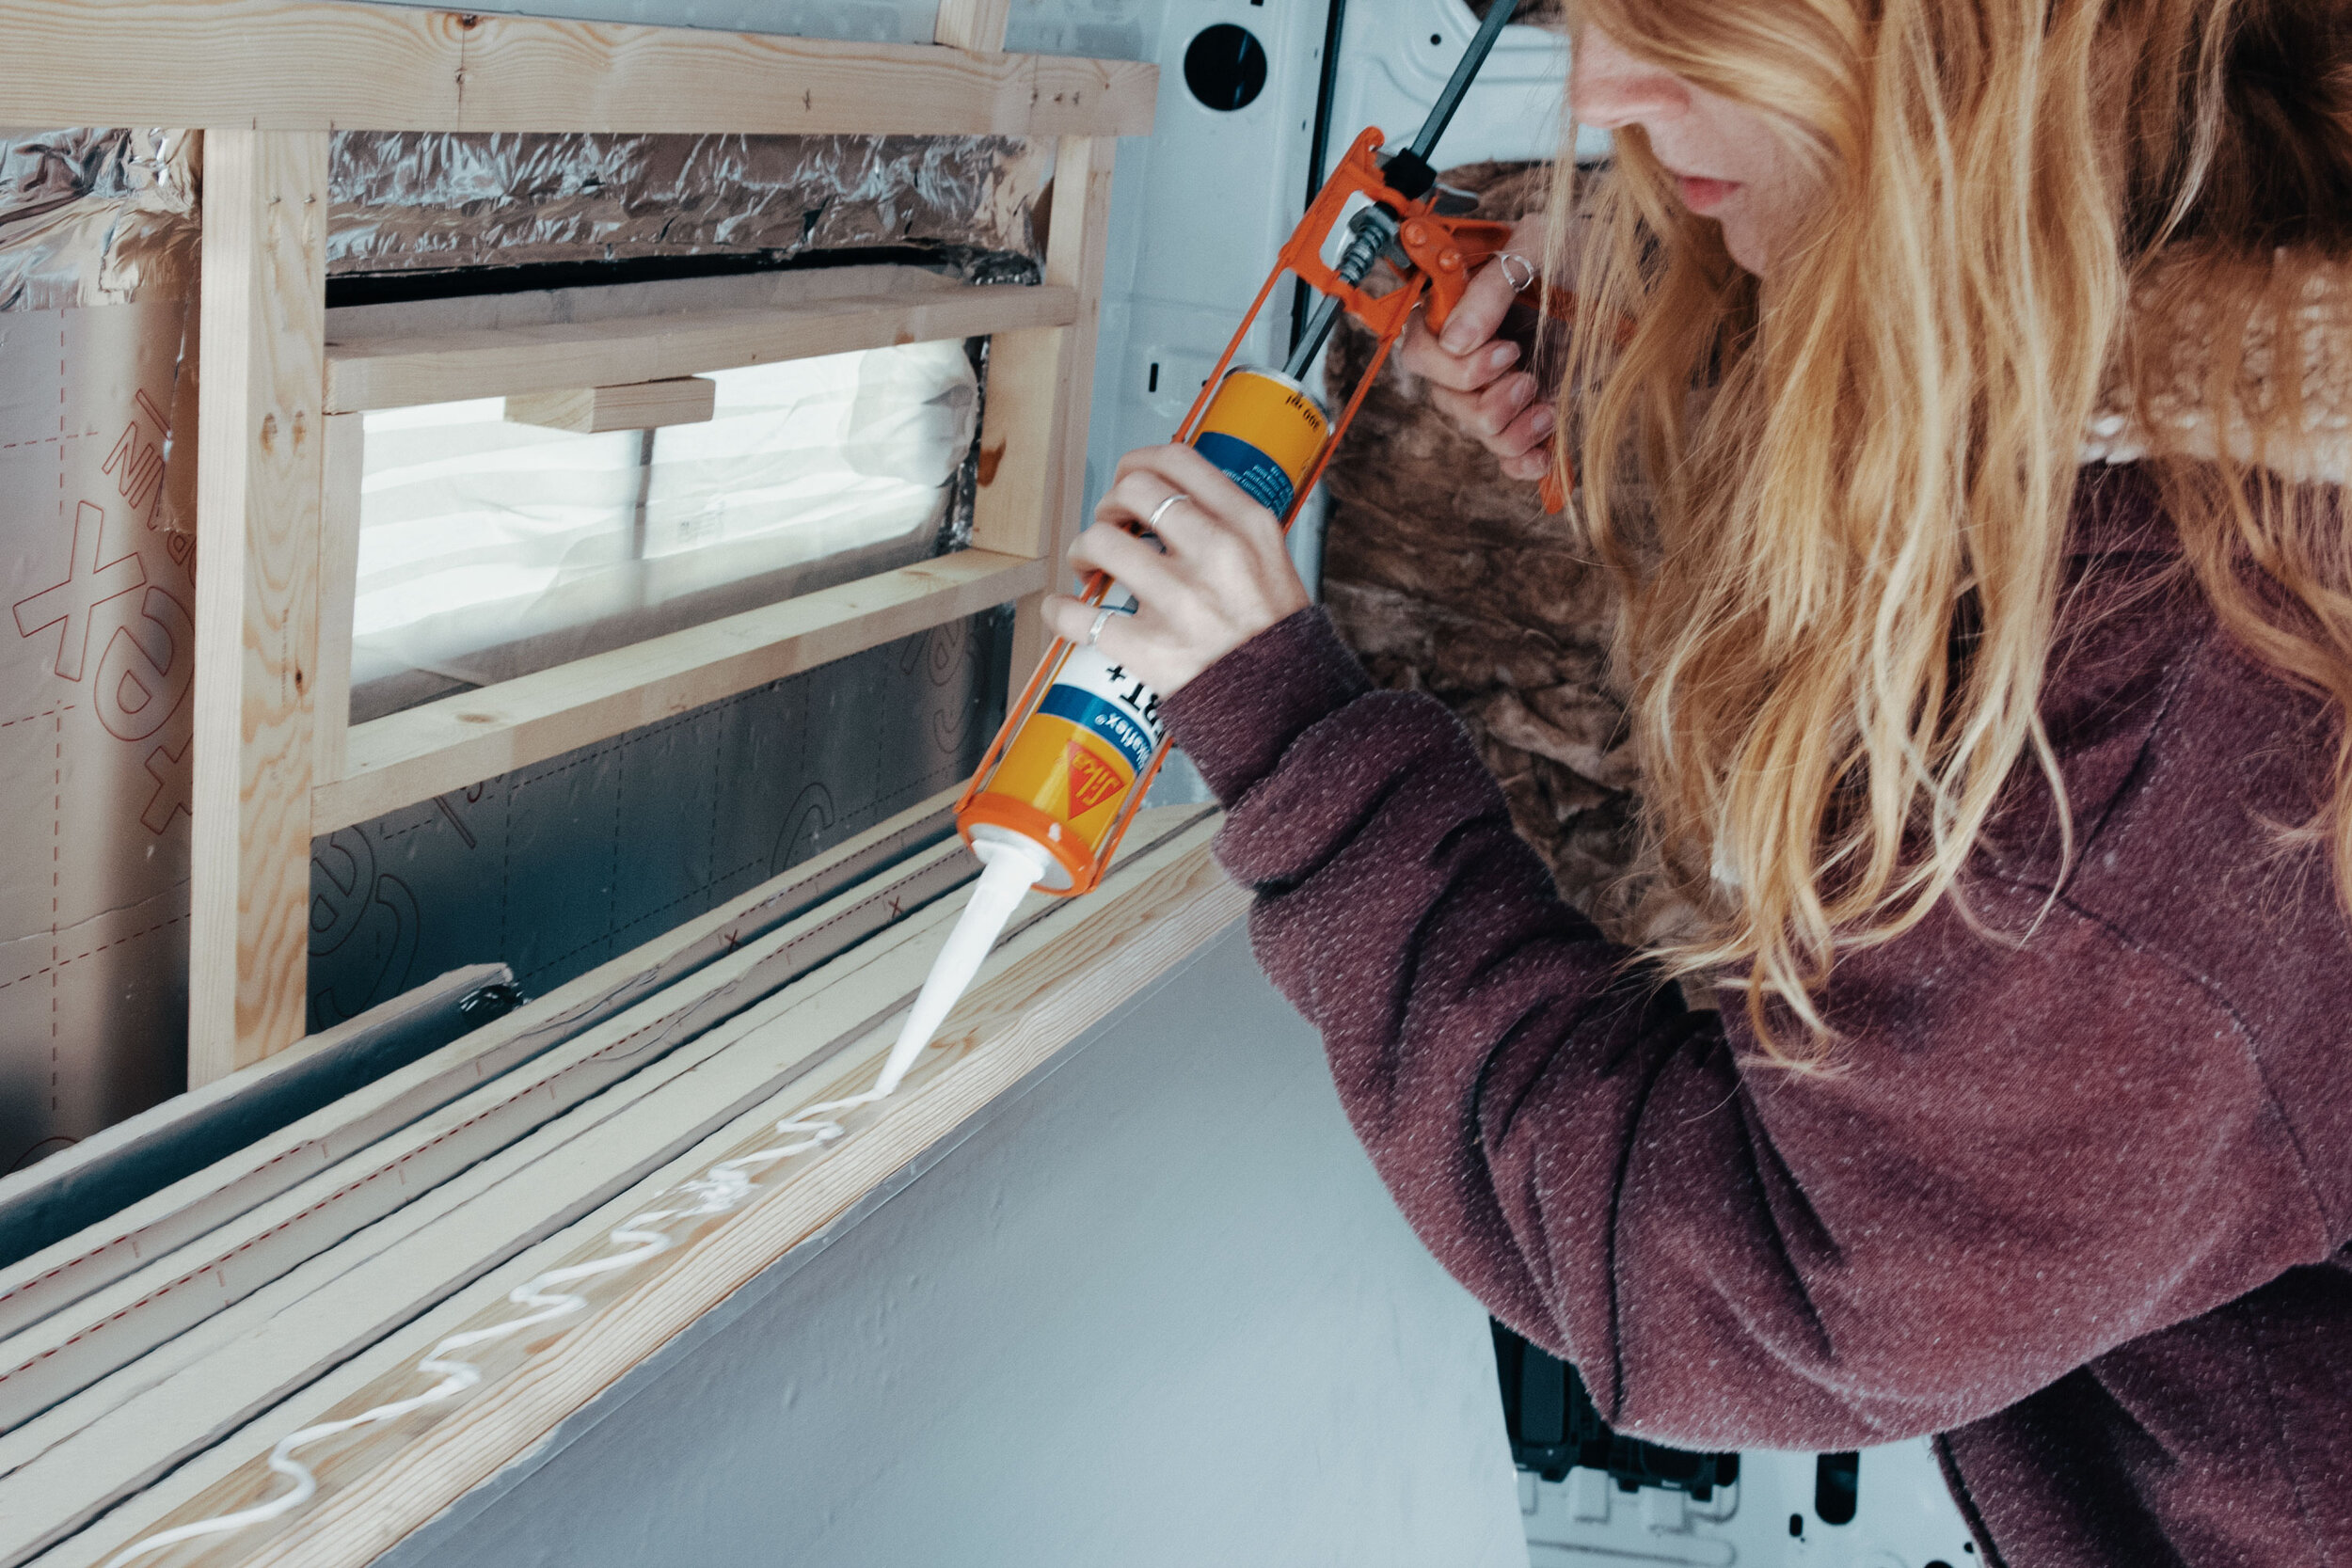
3. Attach wooden battens to the van
We decided to attach the wooden battens before the foil wrap was up, so that we wouldn’t have to screw through the foil bubble wrap. It was a bit of a nightmare for us and ended up taking two days. We decided to use self tapping screws and didn’t drill pilot holes for them. The screws kept burning out against the metal and just wouldn’t bite. We even split two pieces of wood! It was frustrating and we didn’t even think to drill pilot holes until we’d almost finished one side! Drilling the pilot holes made the world of difference and we were able to attach two horizontal battens to the sides of the van, with vertical ones where the ribbing of the van allowed. We used Sikaflex adhesive on the battens before screwing, to prevent any rattling on the metal frame of the van.

Drilling pilot holes (eventually!) for the wooden battens
Using sikaflex adhesive to attach the battens to the van before screwing on

We used a pocket hole jig to attach the large vertical batterns to the horizontal ones
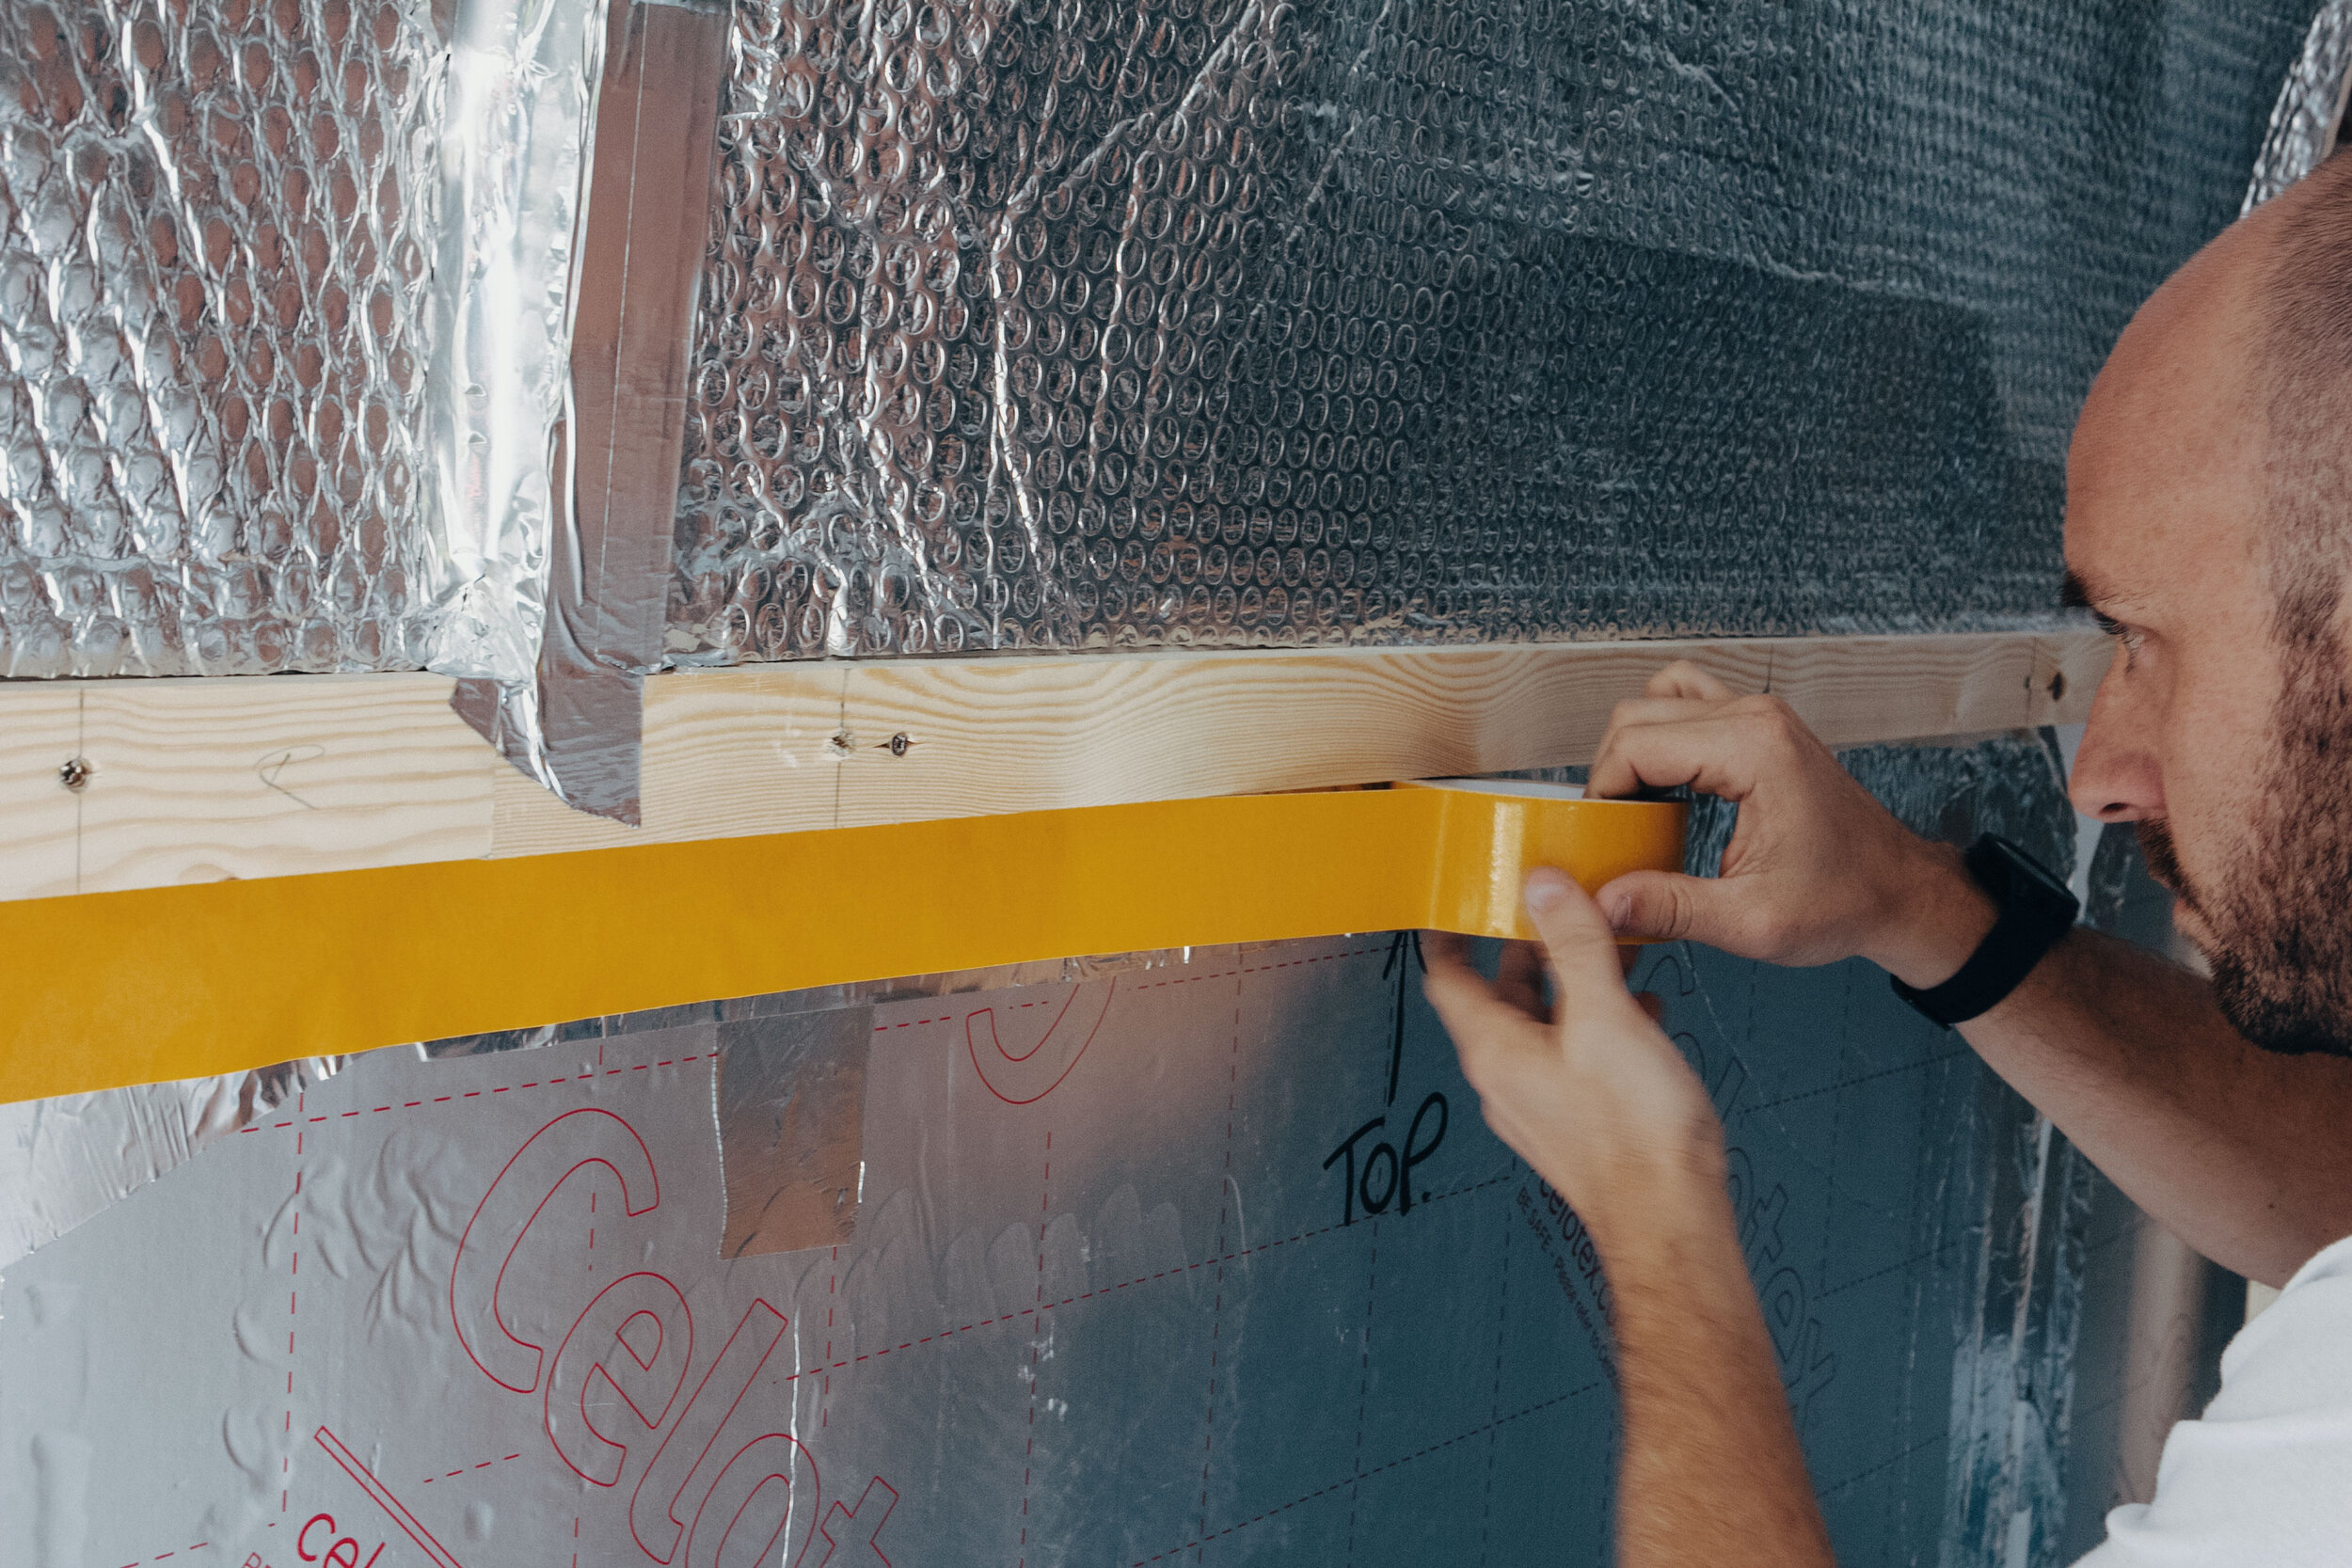
4. Foil wrap and vapour seal the walls
This was the part I was most looking forward to, as it meant a big visual change to the inside of the van. We decided against sticking the foil wrap to the celotex, because it needs an air gap to work properly. Instead, we put the foil wrap between the battens, using the rectangles they’d created as our guides. We secured the foil on the top and bottom edges with double sided tape, then sealed along the wooden battens with aluminium foil to create the vapour seal. There was no adhesive placed on the main parts of the foil wrap.
Cutting the foil wrap to size
Attaching the foil wrap on the top and bottom with double sided tape, to allow for an air gap behind

Foil wrapped walls and vapour sealed battens, all ready to be cladded!

The finished wall, fully insulated
And with that we finally finished insulating the walls. It definitely took longer than we thought. Ensuring the foil wrap was completely vapour sealed, with no gaps, was a fiddly and painstaking job. The battens caused us no end of trouble, but that was most likely inexperience on our side. For the most part though, it didn’t go too bad and now we start planning the floor!
Insulating the Headliner
I wasn’t sure whether to include this or not, because I don’t really have any photos. We decided to insulate behind the headliner and vapour seal here, but we had no idea how much of a task this would be. Removing the headliner is not a technical job, but it does require some firm hands and is best done with at least two of you to hold the thing. We used soft insulation with spray adhesive to insulate here, before vapour sealing with foil wrap and aluminium tape, as standard. Putting the headliner back was a job in itself! It’s bulky, heavy and we risked perforating the foil wrap if it didn’t push back on properly. We did manage to get it back on in the end, but this was down to pushing and shoving rather than skill and know-how. If you haven’t done it yet, give yourself some time to schedule it in, as it might take longer than you think.

Grinning through the pain
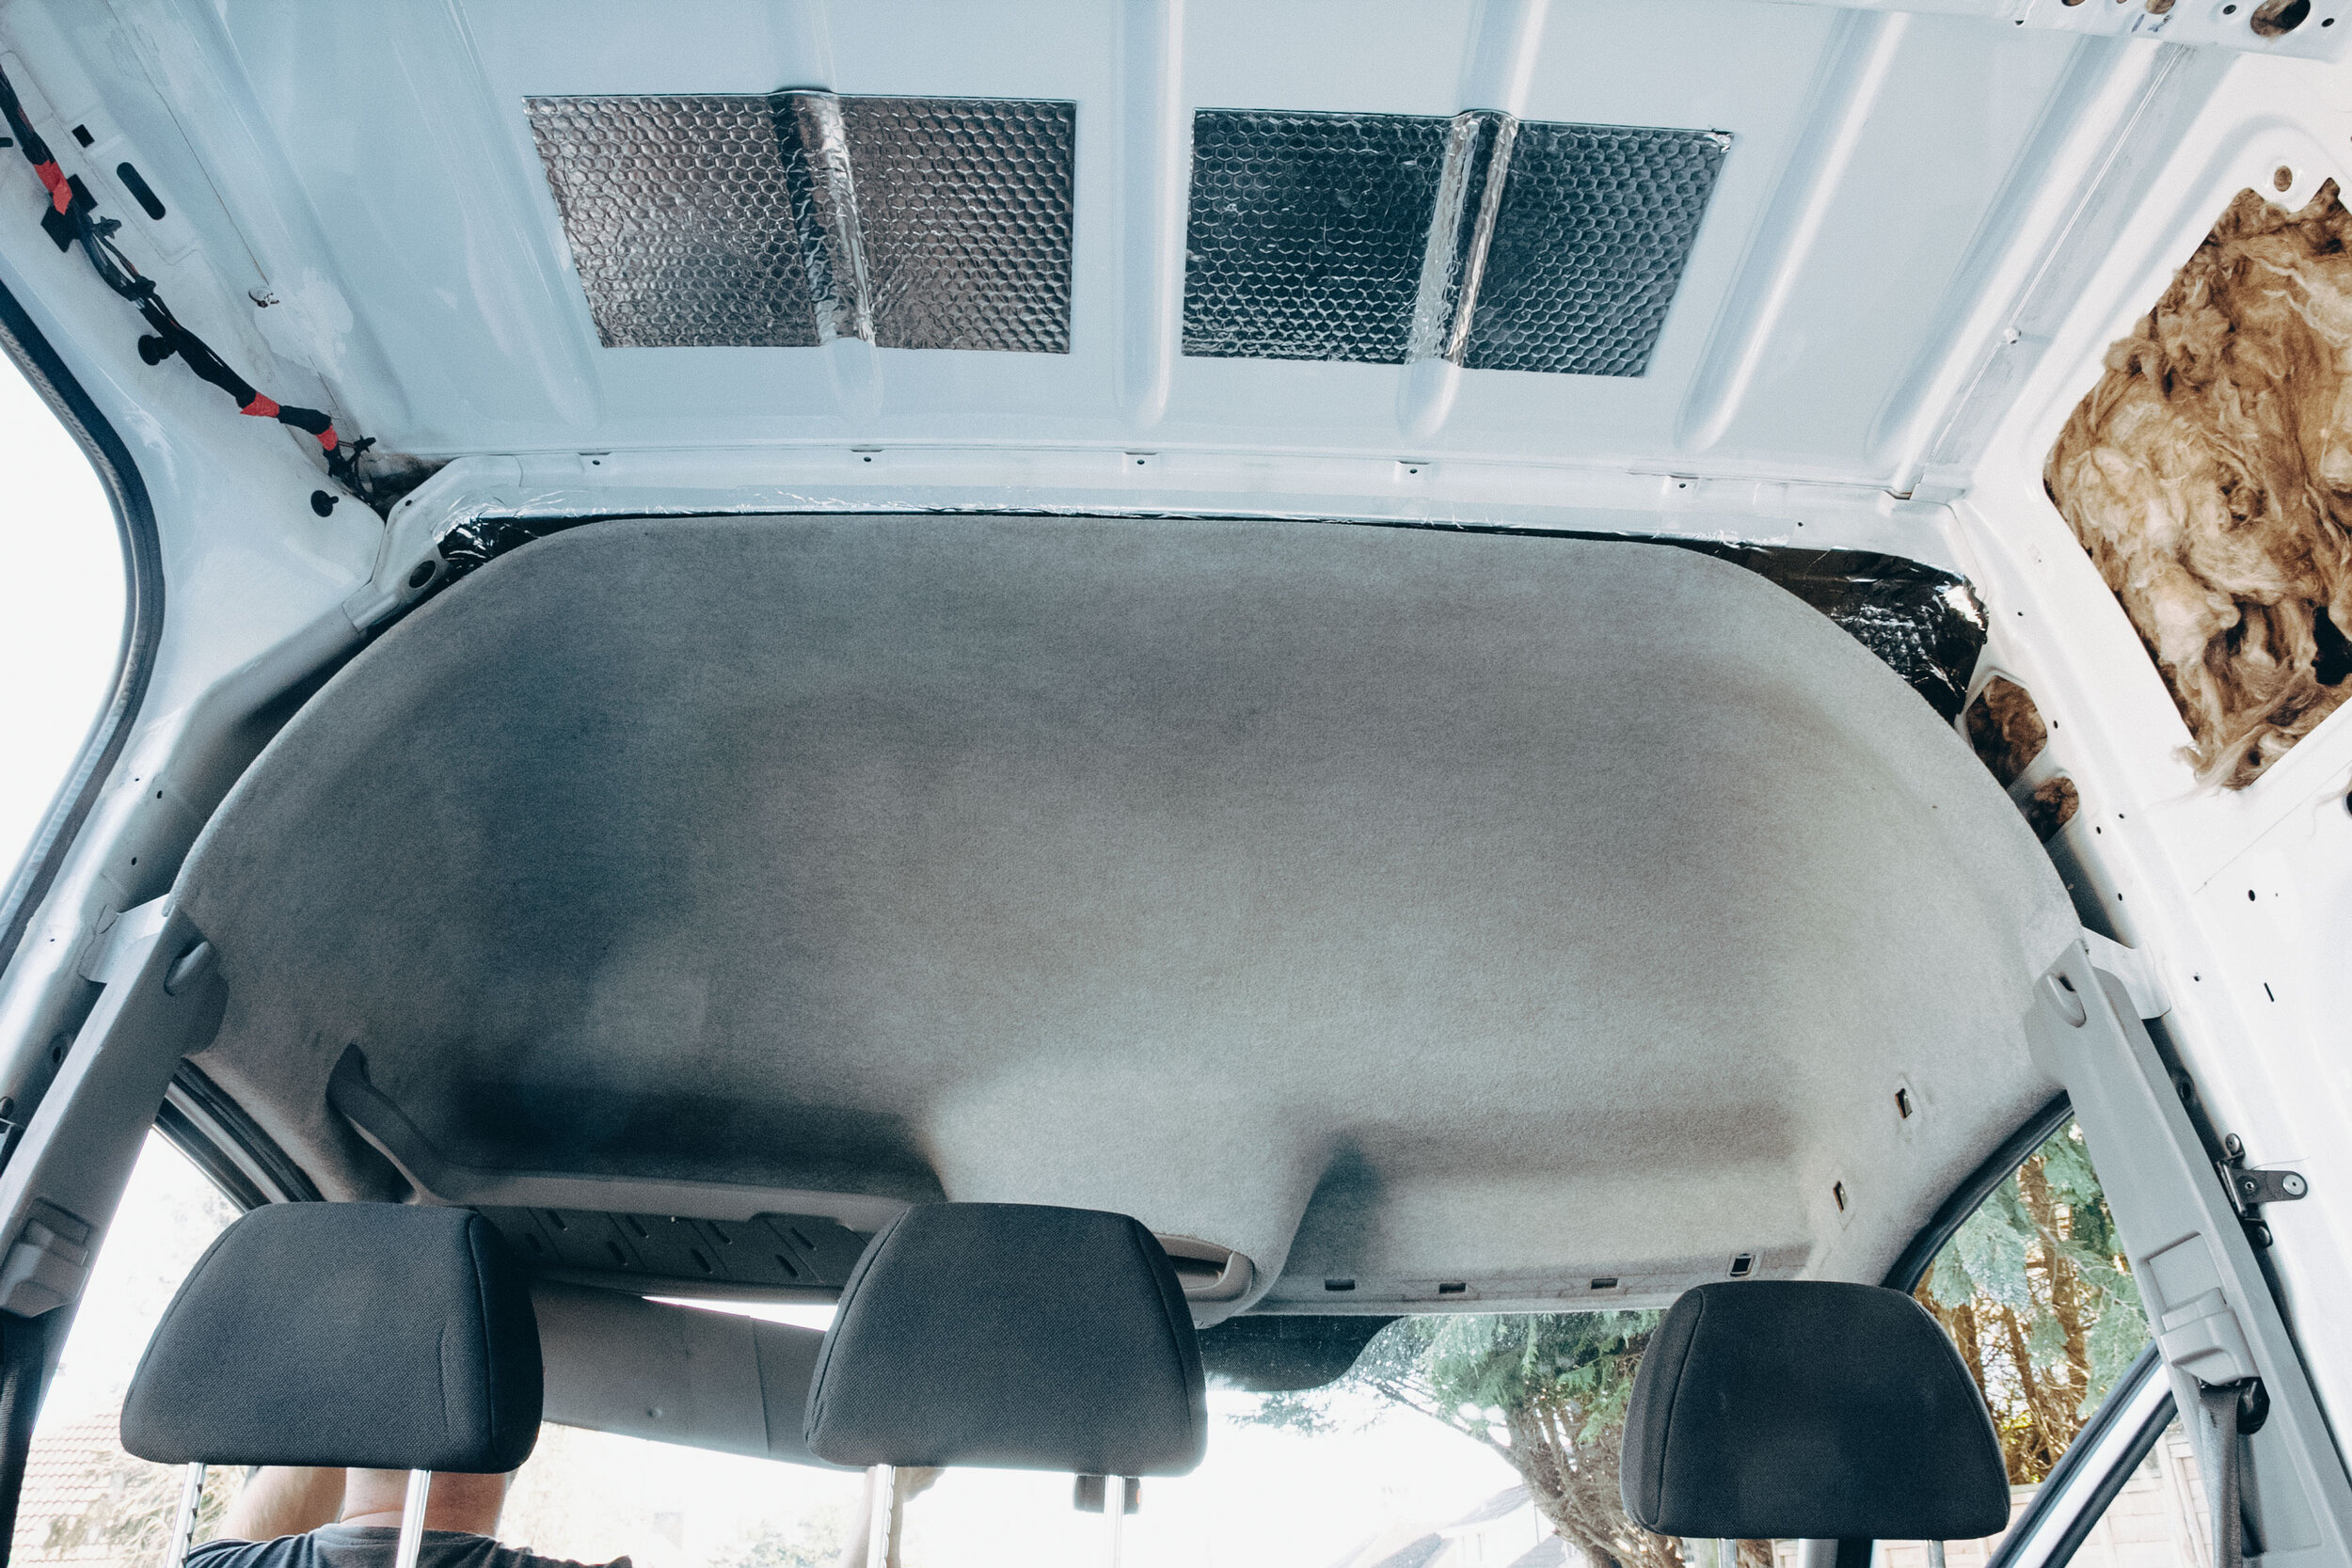
Success! Headliner back in place, fully insulated and vapour sealed
Products We Used:
Celotex Foam Boards - https://bit.ly/2Lm35Za
Foil Wrap Vapour Barrier - https://amzn.to/2YStg1C*
Aluminium Foil Tape - https://amzn.to/2WogvdQ*
Sikaflex EBT - https://amzn.to/3cmguwz*
*Amazon affiliate links